I’ve come a long way in astrophotography from my first photos to my most recent shot of the Orion Nebula. For those 2 years, I’ve been using Pixinsight for about a year and a half. Over that time, I developed a Pixinsight workflow for processing my astrophotography photos. In this Pixinsight tutorial, I will go over my 12 steps of processing a nebula in Pixinsight using narrowband mono images and mono RGB data.
Beginnings With Photoshop
When I first started astrophotography, I didn’t want to either pay for or learn Pixinsight. I also do landscape photography and already had a subscription to Photoshop and Lightroom. Out of curiosity, I downloaded a trial version of Pixinsight when I first started. The interface and learning curve made my head explode, and I didn’t even bother with it after a few attempts.
Six months into astrophotography, I read Pixinsight does a stretch preview through the process called Screen Transfer Function. Having 6 months under my belt now, I knew stretching was an unwieldy process in Photoshop. This in itself made me curious again. The ability to preview an image in a stretched format before stretching it was immensely beneficial. It allowed me to make vital adjustments before stretching it, which resulted in a less noisy image.
The Pixinsight Processing Advantage
I downloaded another trial of Pixinsight and purchased the Inside Pixinsight book. After a month of reading the book and experimenting with Pixinsight, I got the basics down. I could make many adjustments to the linear (unstretched) version of the image. These linear adjustments are the tremendous advantage that Pixinsight has over Photoshop for astrophotographers. Linear adjustments such as Dynamic Crop enabled the cropping of multiple channels in the same way, ensuring proper layering in the future. Dynamic Background Extraction (DBE) gave me the ability to remove the effects of light-pollution from my image, so it was flat with no gradients in it. DBE is a must-have for astrophotographers who live in light-polluted areas like me.
Converting from a Photoshop to Pixinsight workflow was difficult being how different they are. There was a clear learning curve that required time to master. I’m still continuing to learn, as the software has so much to offer. But–the juice was definitely worth the squeeze! Even the $230 I paid for it at the time was one of the best investments I ever made in astrophotography. If there is a single piece of equipment you need to be a successful astrophotographer, this is it. After all, editing is 50% of the process and this is the only tool you need. Compare that to the $5,000 + you spent on astrophotography equipment.
Pixinsight Tutorial for Nebulas (Mono)
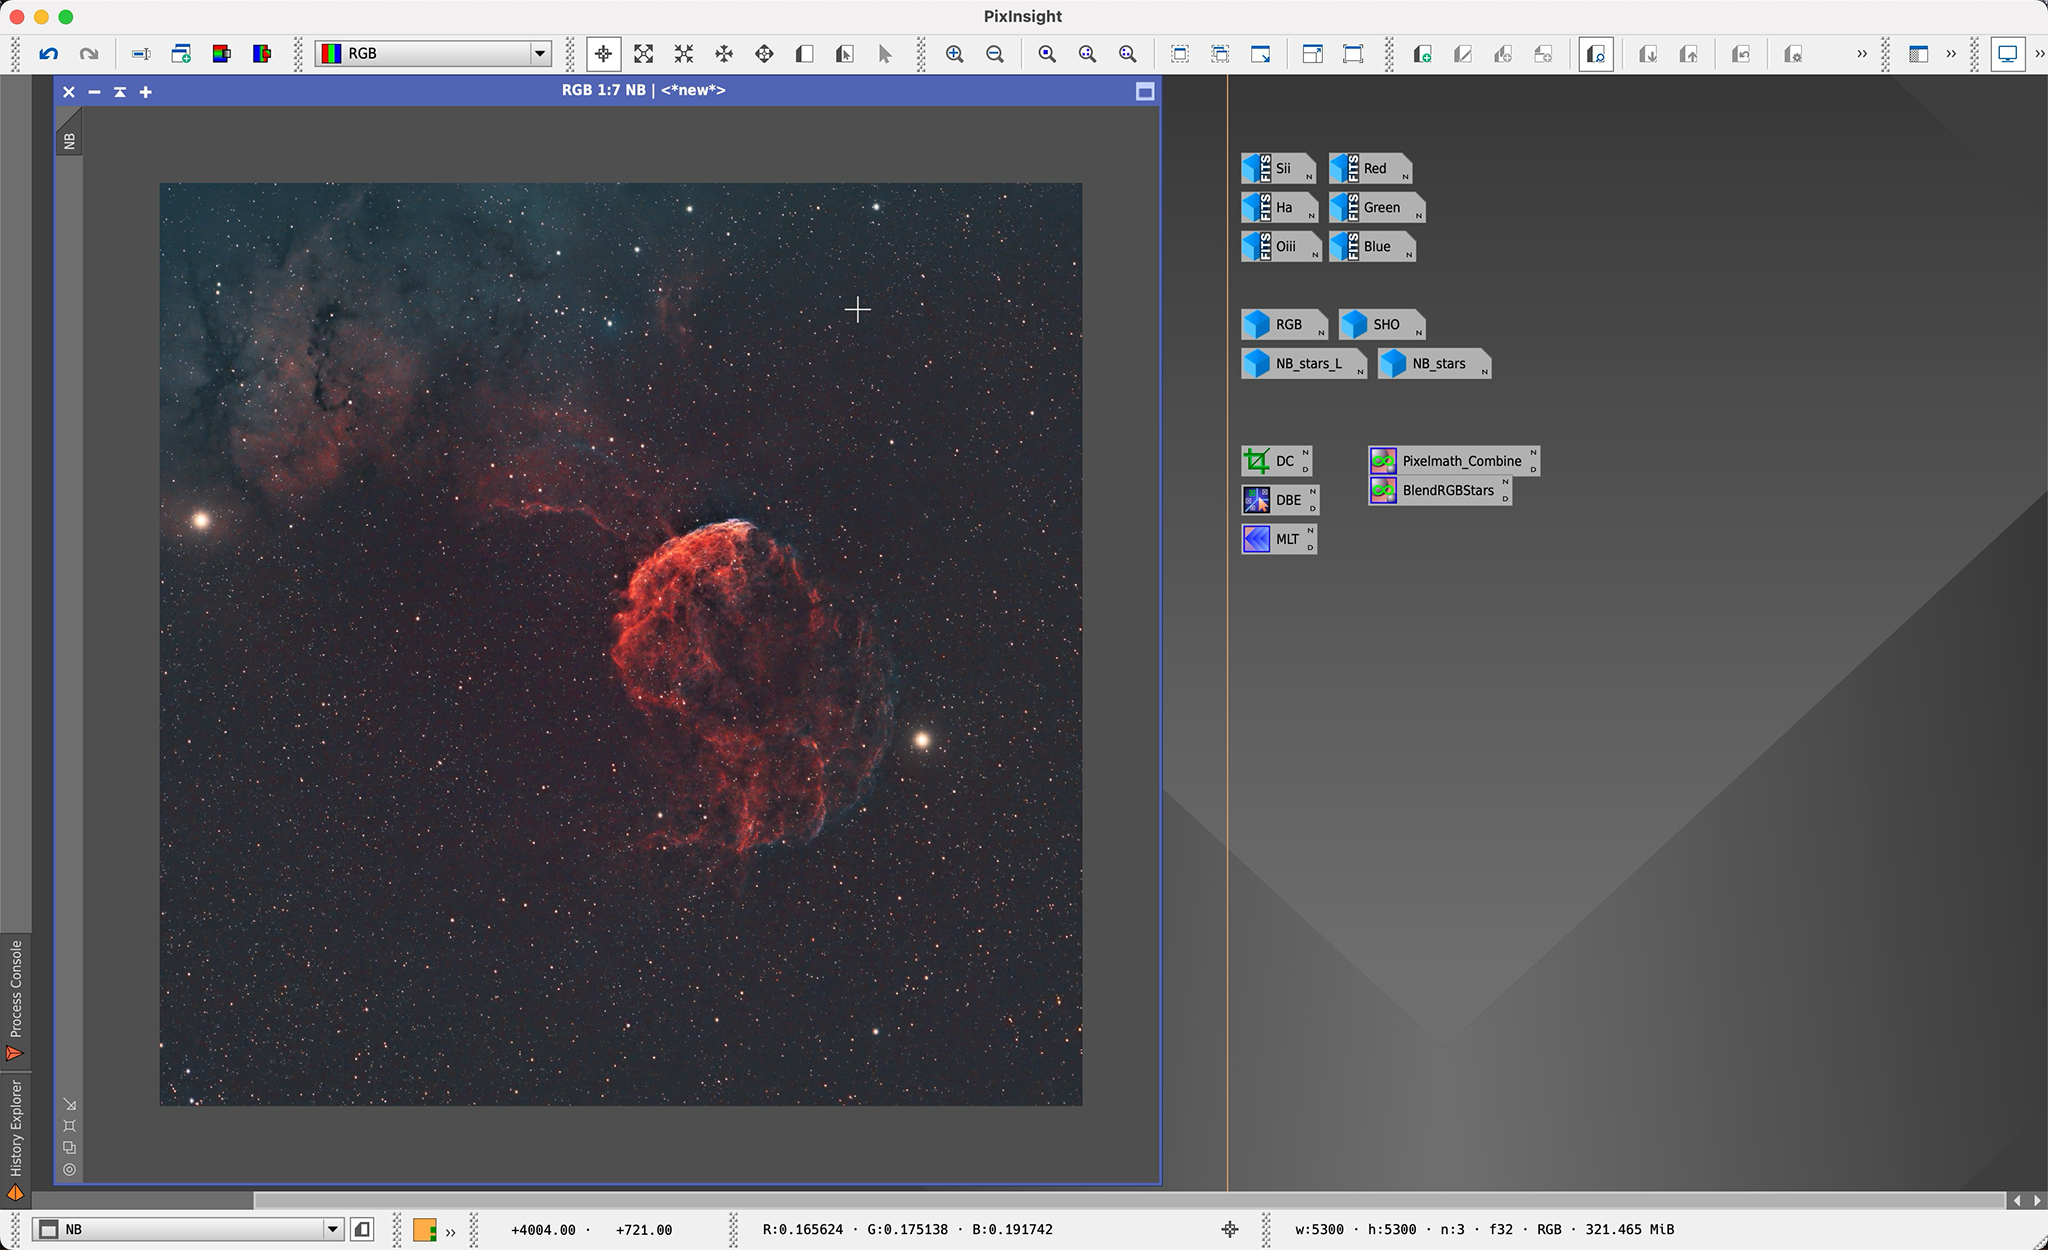
Step 0. Loading All Mono Master Images
Ha, Oiii, Sii, Red, Green, Blue, and Luminance. I processed these in Astro Pixel Processor; I don’t use Pixinsight for stacking my images.
Step 1: Dynamic Crop
You need to find a common crop for all your final mono master files (Ha, Sii, Oiii, RGB). Dynamic Crop helps with cropping all your images in the same exact way. This is an important part of this Pixinsight tutorial, as all your images need to line up perfectly when merged in a later stage.
Step 2: Dynamic Background Extraction
Dynamic Background Extraction, often abbreviated as DBE removes light pollution and gradients caused by extraneous light from your images, giving you a flat dark background. This Pixinsight process is hugely important for my fellow astrophotographers who live in light-polluted areas like me.
Step 3: Deconvolution with Blur Xterminator
Deconvolution is the sharpening of your image; it removes blur due to the inevitable loss of quality you will have when shooting long exposures millions of miles. Blur Xterminator is a paid plugin from RC Astro that makes the deconvolution process much easier. While not a required Pixinsight process, it’s highly recommended to do which is why buying Blur Xterminator is recommended!
Step 4: Multiscale Linear Transform
The 4th step in this Pixinsight tutorial is Multiscale Linear Transform (MLT). MLT is a linear state noise reduction process. Its wavelet-based method lets you tailor how much noise reduction is applied to individual layers of your image.
Step 5: RGB Comination & Color Calibration
I shoot RGB stars for all nebulas which I believe results in a more colorful and interesting image. In this step of this Pixinsight Tutorial, I go through how to combine RGB images using channel combination and doing a simple color calibration.
Step 6: Histogram Transformation
There are many ways to stretch an image in Pixinsight. However, Histogram Transformation is probably the most common Pixinsight process for stretching images. I also think Histogram Transformation is the best method for nebulas–that is why I choose Histogram Transformation to go over in this Pixinsight tutorial.
Step 7: Pixelmath Narrowband RGB Combination
Rather than map Sii, Ha, and Oiii to RGB which creates a SHO image, I combine my narrowband data using a Pixelmath formula from this website. You can also download my Pixinsight icon here to use alongside this tutorial.
Step 8: Using Hydrogen Alpha as Luminance
After combining my narrowband image to RGB, I apply my hydrogen alpha (Ha) image in as a luminance layer. I find this greatly enhances the image. While it may be the simplest process in this Pixinsight tutorial, it’s a process that makes a big difference.
Step 9: Star Xterminator
At this stage, I’m finally ready to make some image adjustments like contrast, saturation, sharpening, etc. However, I want to apply these adjustments to the nebula ONLY, not my stars. I use Star Xterminator (another paid plugin) to remove the stars and cleanly make these adjustments to the nebula only.
Step 10: Intensity Transformations
In this step, I make contrast, saturation, color, and sharpening adjustments to the starless nebula.
Step 11: Recombine Stars with the Nebula
With the intensity transformations done, I can now recombine my stars with the nebula. I have a handy formula to do this which you can download here.
Step 12: Pixinsight Workflow Final Touches
Everything looks great by this point and we are just about finished with this Pixinsight workflow. I just want to do some final touches which usually include further contrast adjustments, saturation, and dark structure enhance.