It’s been a long year as I feel so much has happened in such a short period. My journey began last April 2022 when I purchased a telescope at Best Buy and I now sit here with an AM5 mount, 2 telescopes, and a mono camera. I surely got bitten by the bug, and I’m a lot poorer than I should be, but it’s been one of the most rewarding hobbies I’ve ever had in my life.
I’m writing about my experience for those who are getting into astrophotography, with the goal of making it simpler if you’re just beginning. I invested a great deal of time finding the best mounts, telescopes, cameras that will suit what I was trying to accomplish, as well as learning the ins and outs of astrophotography. From my first telescope to today where I’m rocking a ZWO AM5, Redcat 51, Astro-Tech AT115EDT and an ASI533MM mono camera with Antlia filters—It’s definitely been a super frustrating yet rewarding experience. To me, it’s kind of similar to something like writing code or any area that requires a lot of detail. If one little thing goes wrong, the whole thing collapses! While it’s not a very forgiving hobby, the challenge makes it exciting. You will stumble and you will learn.
My First Telescope – Celestron Starsense
Around this time last year, my 5-year-old daughter asked me to buy her a telescope. I looked on Best Buy’s website to see what they had in stock. I wanted to invest in one and what I meant by invest was about $300-$400 which seems laughable at this point.
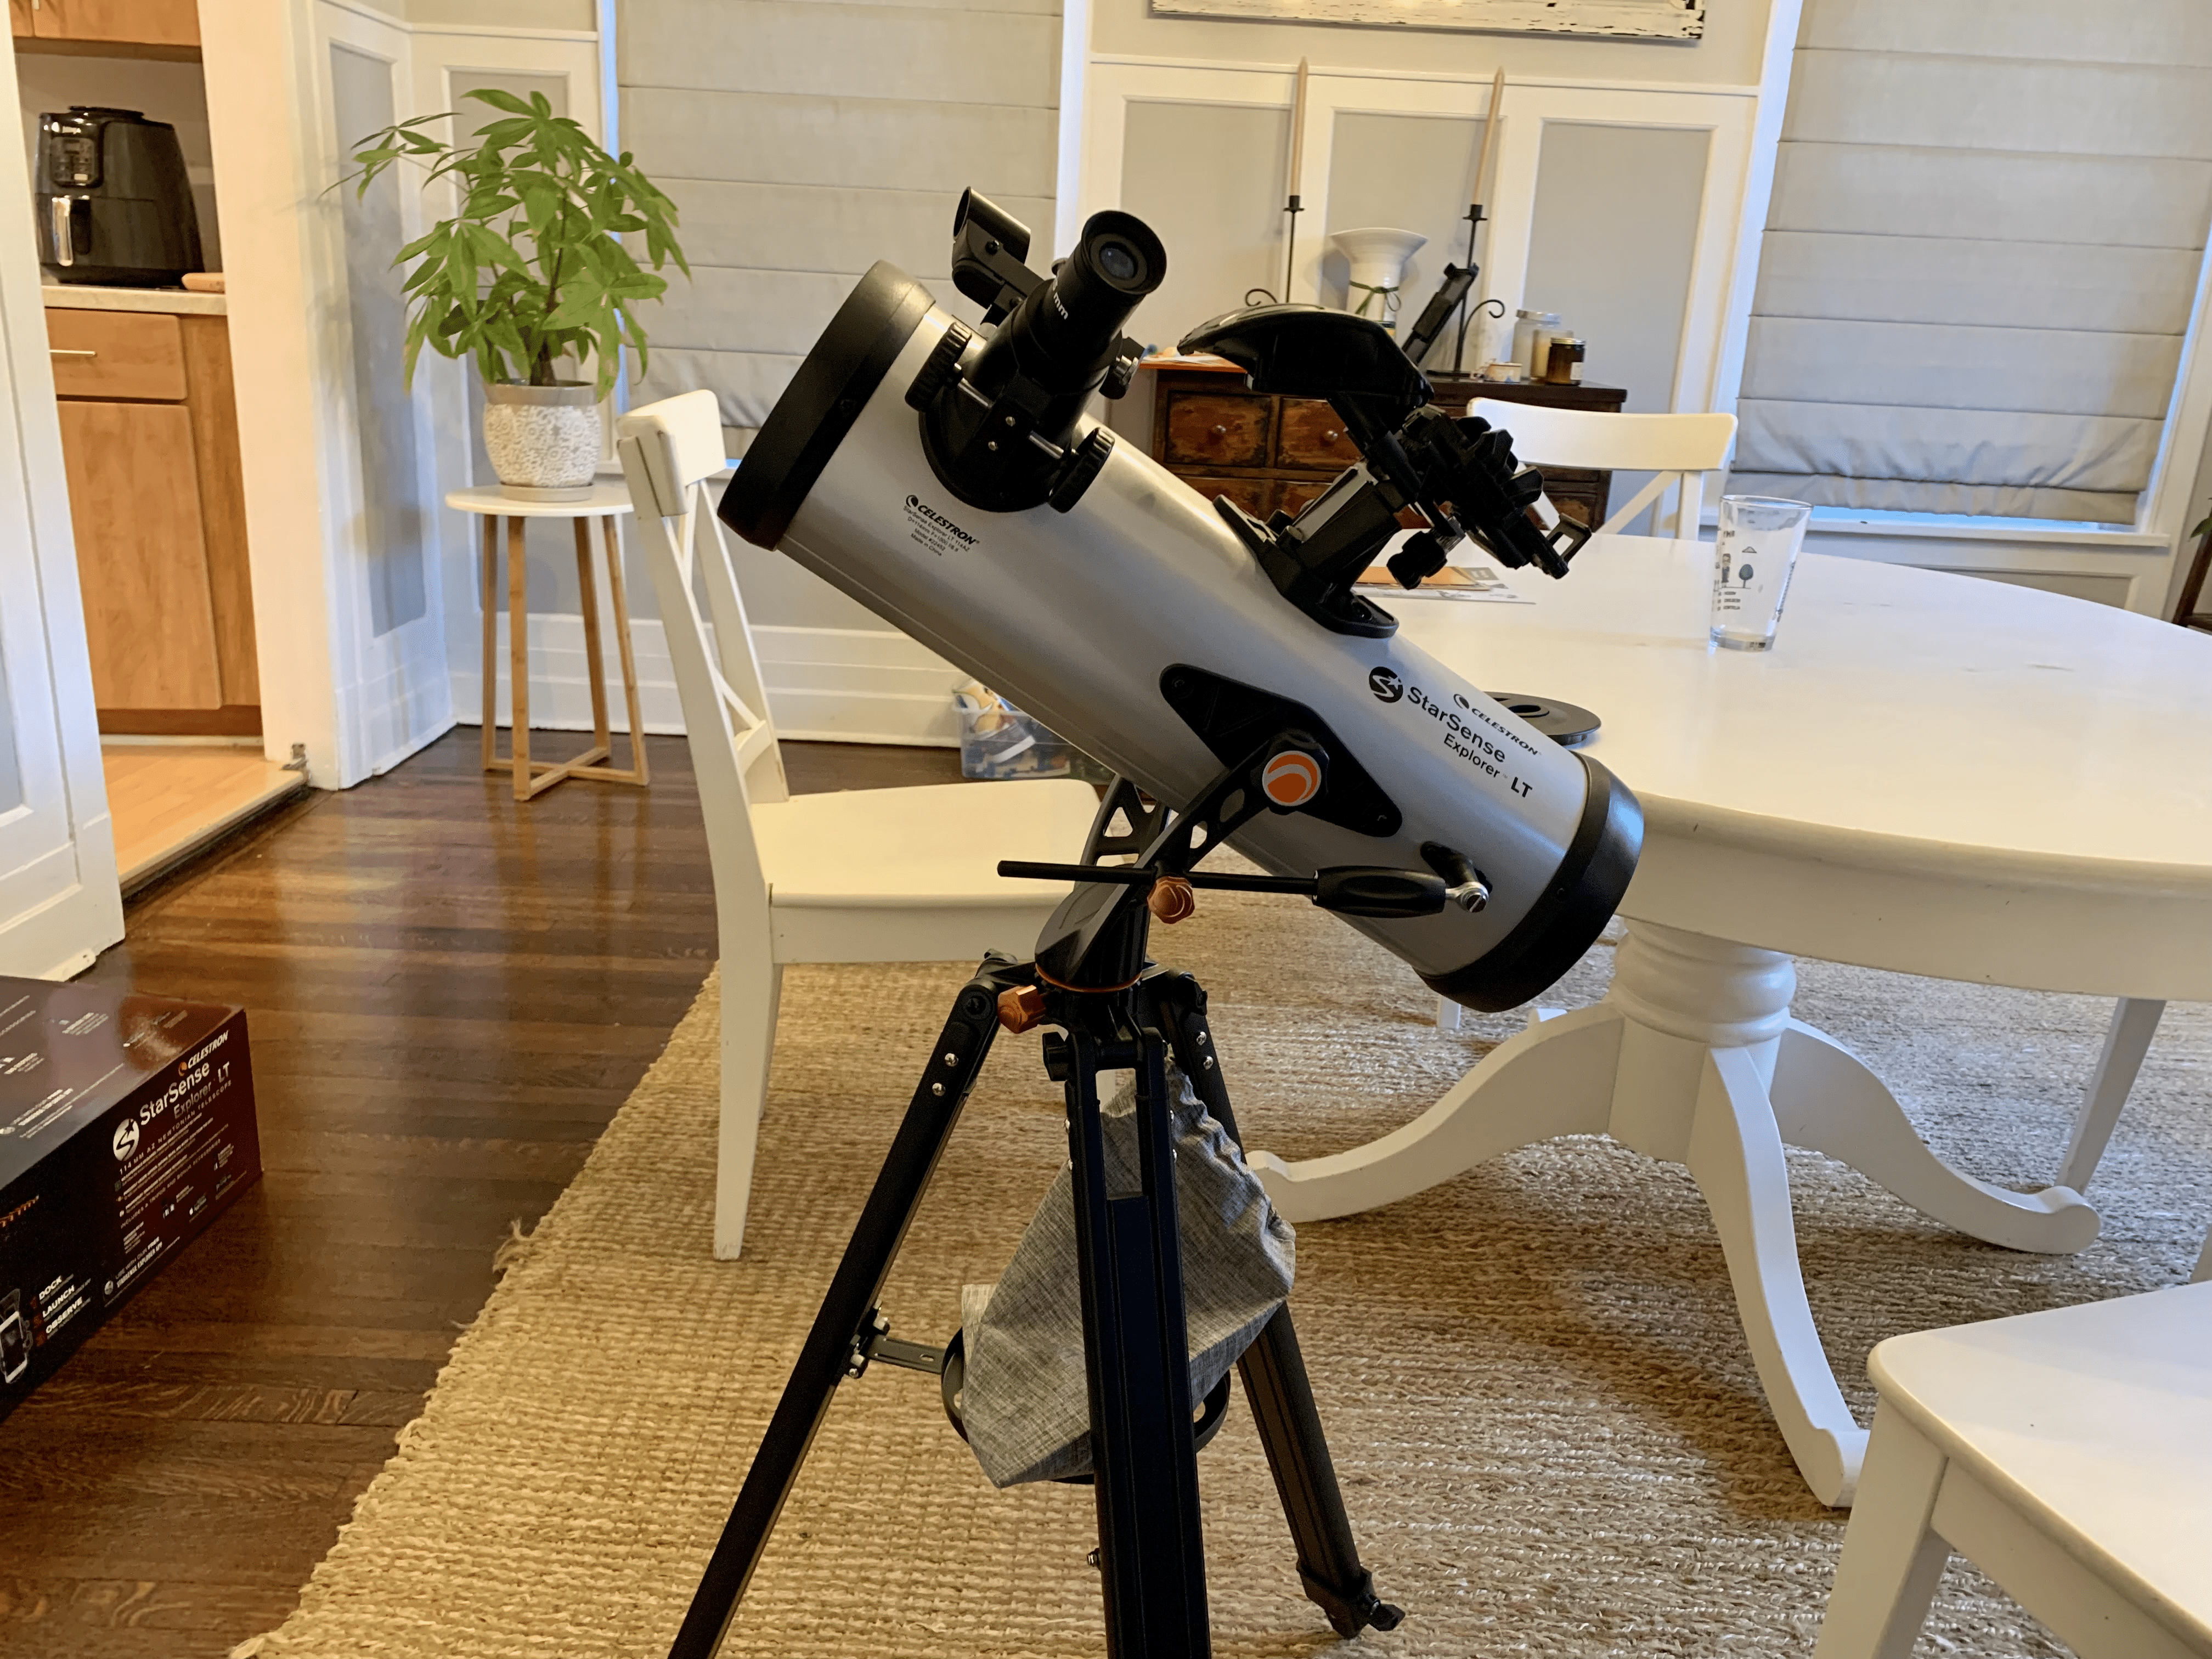
At Best Buy, I purchased a Celestron Starsense Explorer 130 mm f5 Newtonian, which was one of the few telescopes available. I put it together and then read more online about Newtonian telescopes. I learned they had a larger aperture which allowed more light to be collected, and I also learned they needed to be collimated to perform at their best. Being I paid $400 for this, and it included a mobile app to surf the skies, I knew this would not be a high quality collimated at-the-factory scope. I immediately bought a Cheshire eyepiece and made myself a collimation cap by drilling a tiny hole in the middle of the focuser cap.
So, I collimated it, or at least I think I did. I precisely followed Astrobaby’s collimation guide, which was a complete headache–the author even admits its difficult for beginners.
I was content for some time looking at stars through the telescope, but my targets ran scarce in my heavily light-polluted skies (Bottle 8-9). It was so disappointing to look at the Celestron app and see all these grand objects, but none of them were visible to me. I tried looking at the Beehive cluster (M44) many times, only to see a few lame white stars in my eyepiece; nothing like the colorful photos you see of M44. M81 (Bode’s Galaxy) was totally out of the question. I slewed to its spot in the sky via the app, but nothing but a black sky was visible. The moon was obviously the best thing to view in this telescope, and if I had found I had a genuine passion for lunar observation, I would have kept this telescope.
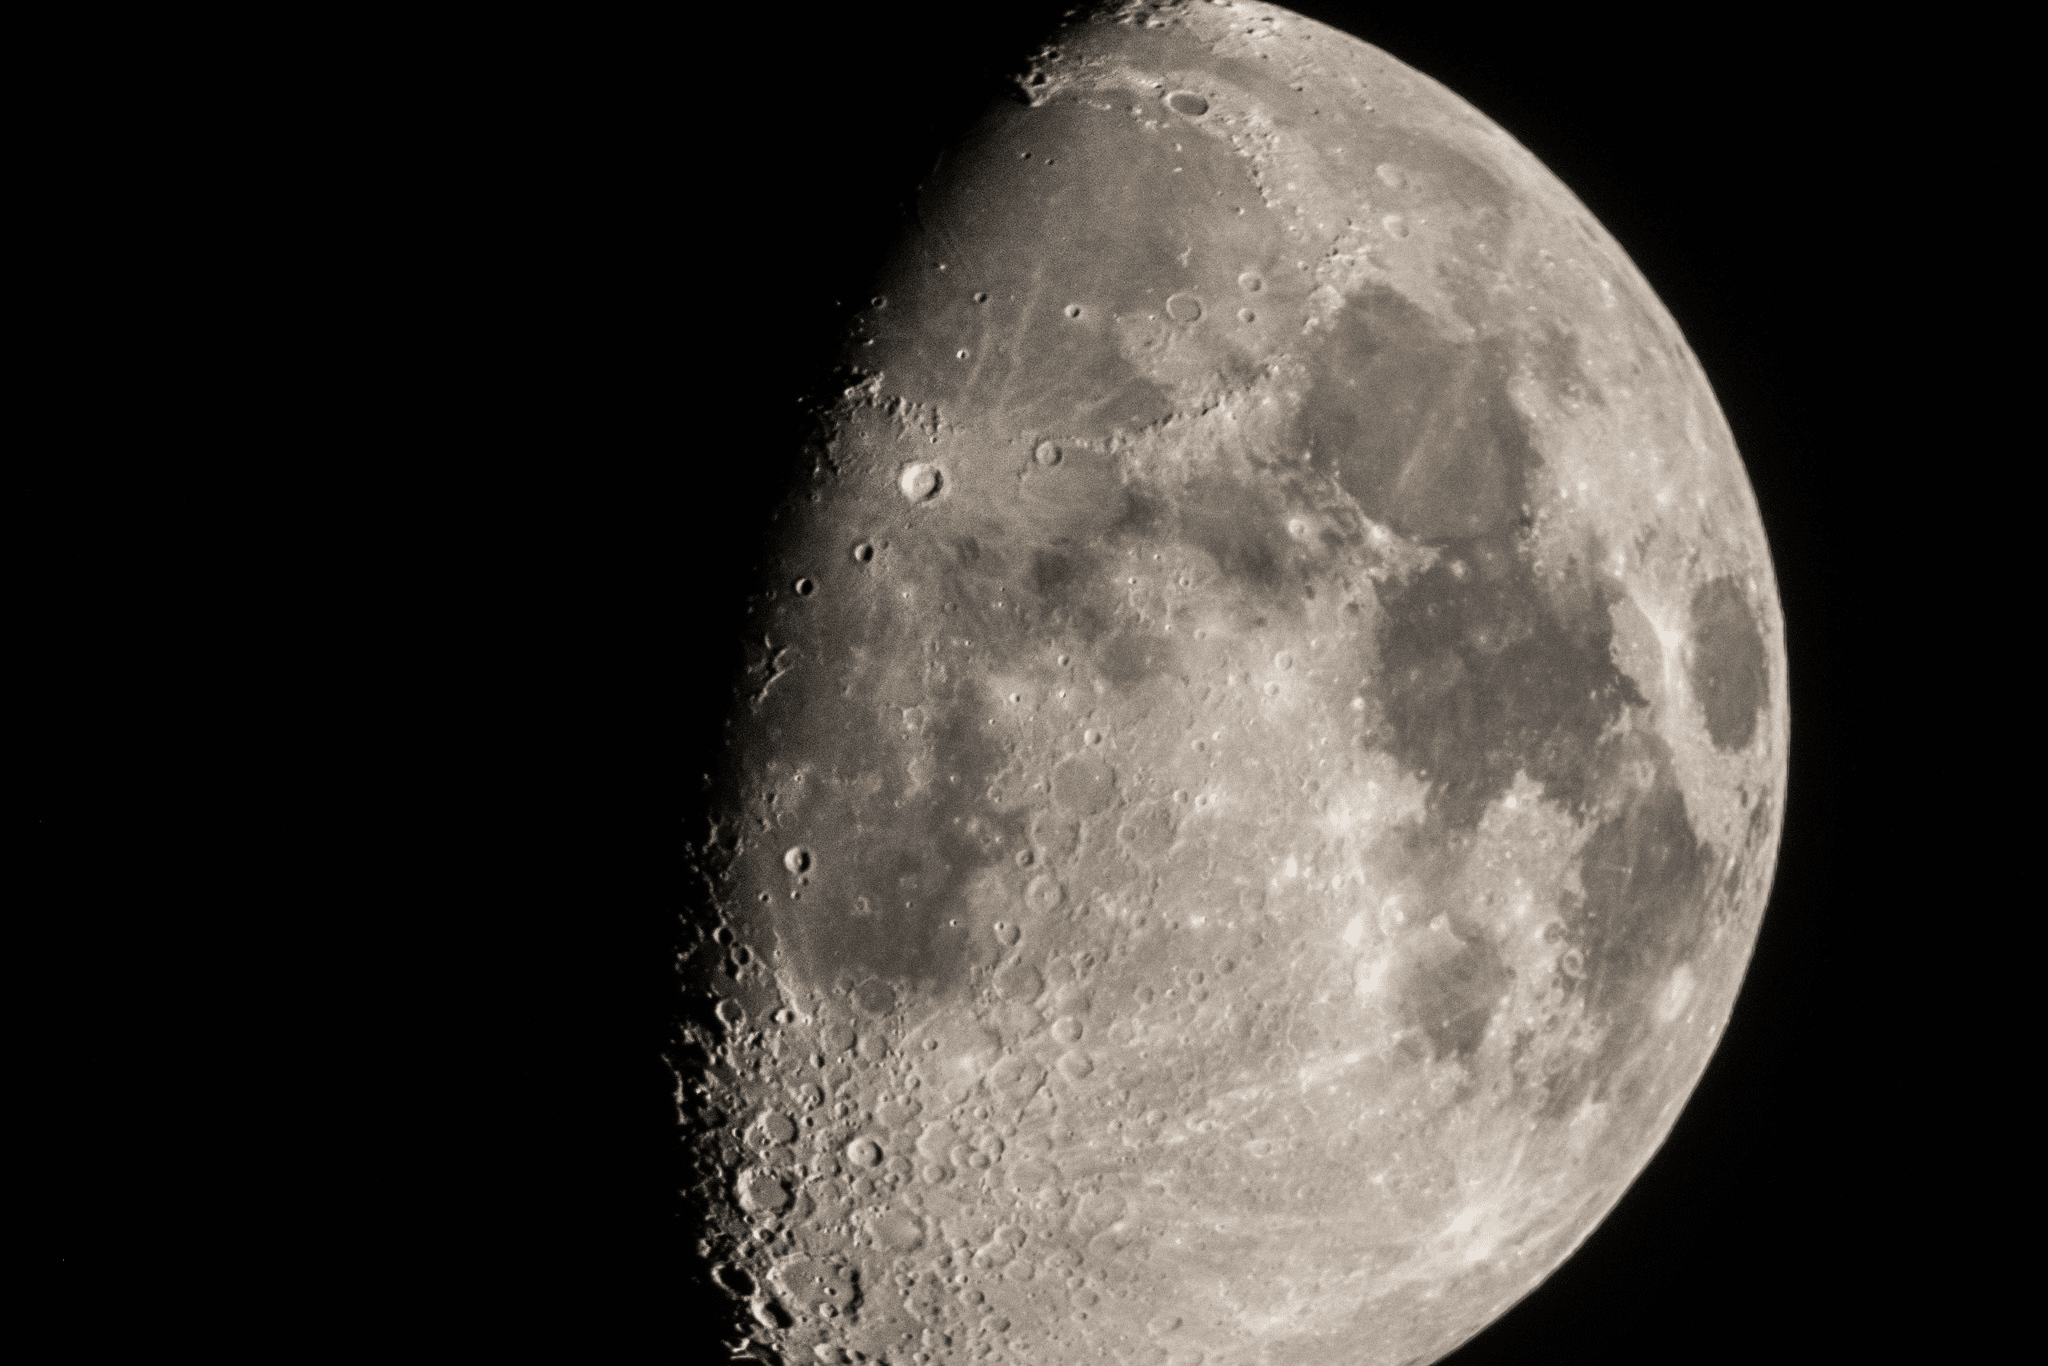
Then came a turning point. I wondered if I could put my Fujifilm X-S10 into the focuser and take a picture. I bought an accessory to do that, but it failed as I couldn’t achieve focus at any point. Then I read online that if you put a Barlow lens into the imaging train, it would help achieve focus. So, I tried it and to my absolute amazement–it worked. Not only was I getting an image of the moon through my camera, I was getting double my focal length with the 2x Barlow lens, providing a closer and more detailed view of the moon! Until this day, I still have not achieved a picture of the moon this good with my costly astrophotography setup, but that’s not what I bought my equipment for, and it’s not something I often try or even care to do.
After I took many pictures of our beautiful moon, I started taking pictures of stars like Vega and Deneb. They would trail on longer exposures, which lead me to the 500 rule. Since my telescope was 650mm and the Barlow doubled that, I was working with 1300mm. At that focal length, I could only do a 1/4 second exposure based on the 500 rule without having trailing stars. After I took this photo, I opened Lightroom and boosted both the clarity and texture in camera RAW and suddenly, there were hundreds of stars to be seen that I never saw through my eyepiece. I debated if those so-called stars were just noise, but the pattern was not like noise, and they really looked like stars!
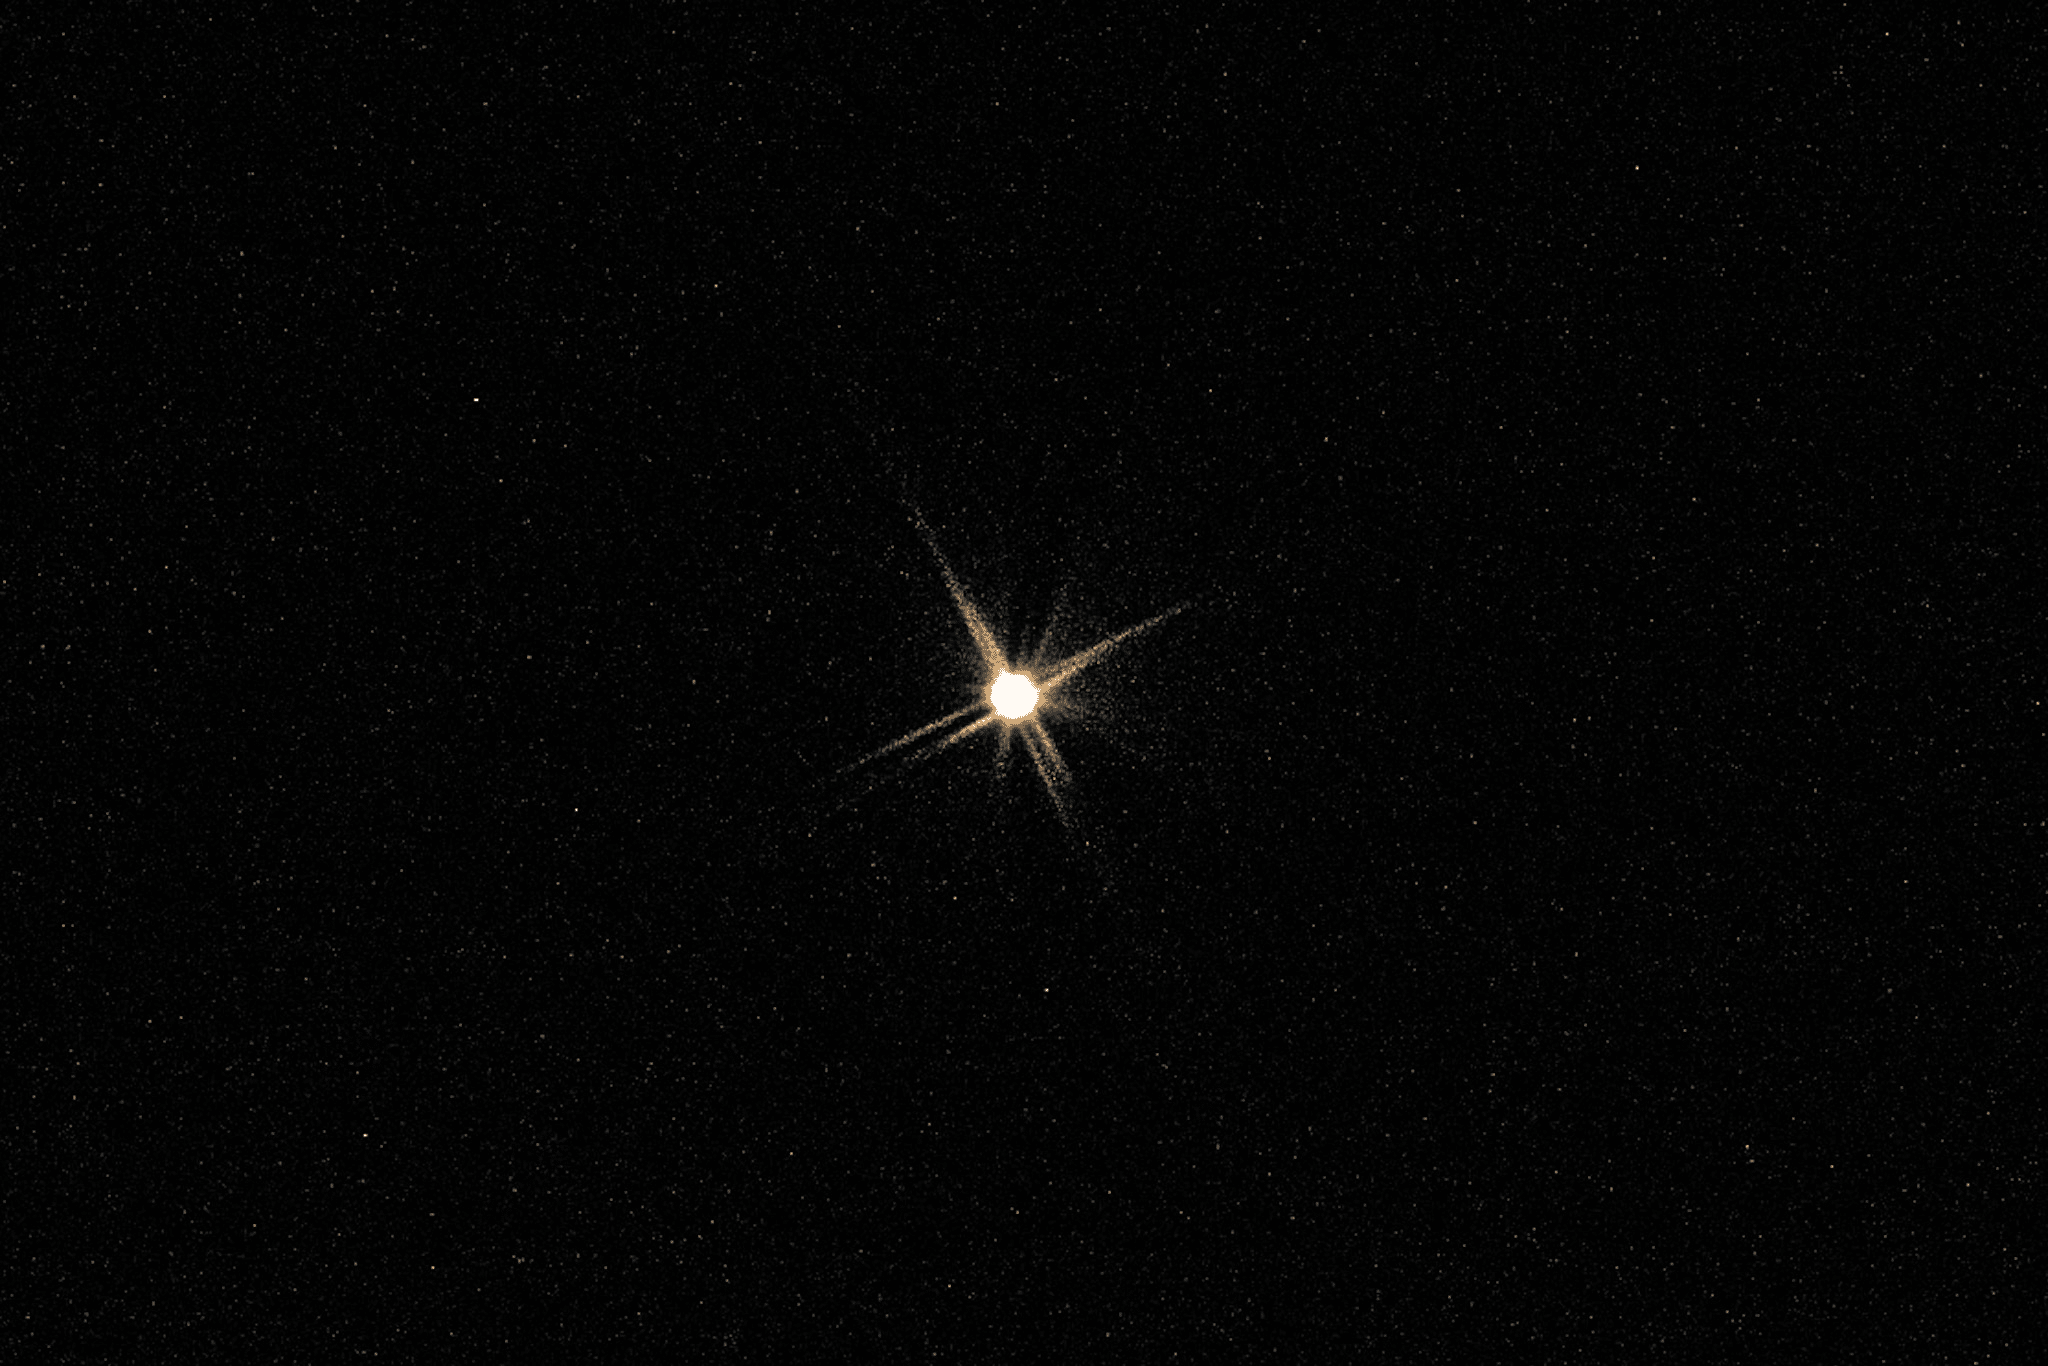
I’ve done photography for years, and the idea of the camera revealing more than I could see through the eyepiece with a little editing in Lightroom was alluring. It’s like people who believe a camera can see ghosts, although our human eyes can not. I felt like I saw a ghost–the camera picked up something my eyes could never have.
Astrophotography Beginnings
After discovering the joy of taking pictures with my telescope, I returned the Celestron Starsense and get a telescope and mount that was better suited for deep sky astrophotography. I didn’t know if I’d stick with this hobby, so I went small. I started with a Redcat 51, Skyguider Pro and an ASI120mm/ZWO mini-scope for guiding. An investment of around $1,500. I’d sell it if it didn’t work out. I’d continue to use my Fujifilm X-S10 mirrorless camera.
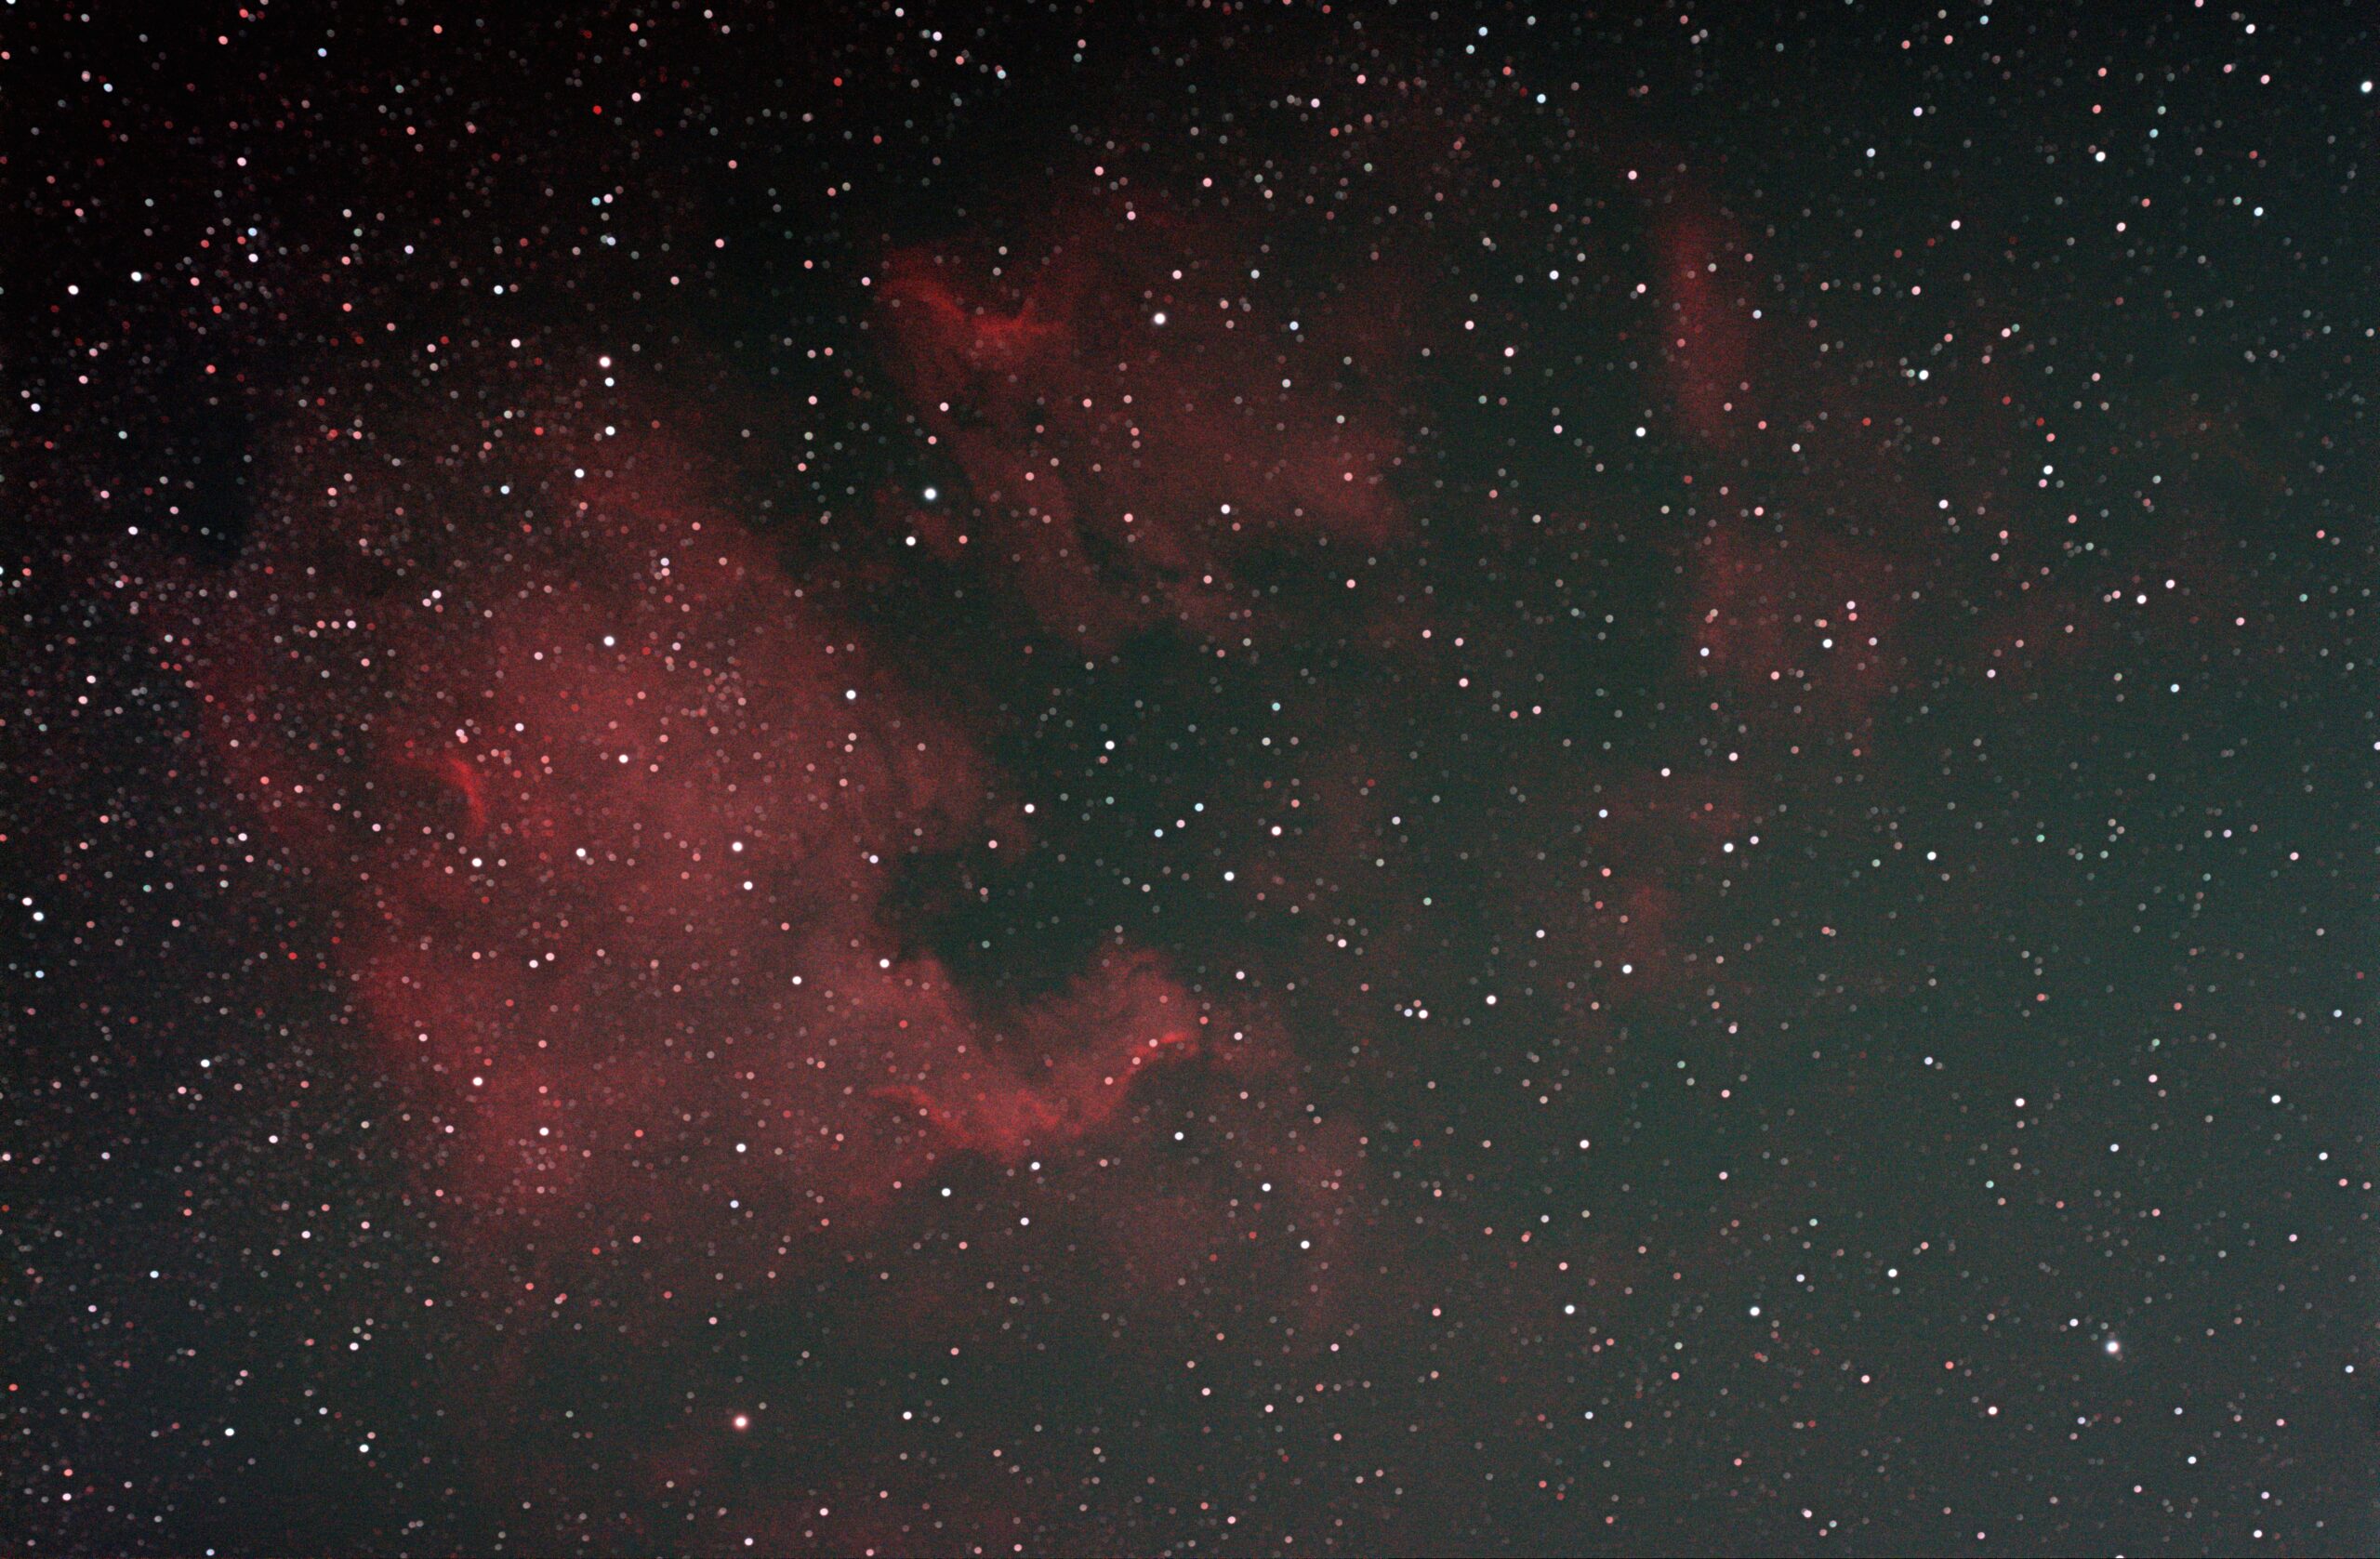
There was one big problem with this setup–the software. No astrophotography program supported Fujifilm, and my Skyguider Pro had no go to functionality. The North American Nebula was my first target for good reason–it was next to the star Deneb, which is seen even in the most light-polluted areas. Star-hopping my way to the North America Nebula, I kept taking pictures until I got a picture that showed some nebulosity. I connected the computer to the camera and transferred pictures directly to the Mac when I took them. Then, I opened them in Photoshop and quickly stretched it in camera RAW to see if anything was visible. I repeated this like 15–20 times, which took half the night!
I finally got the North American Nebula (and Pelican Nebula) centered, as illustrated in the photo below. I got about 2 hours of imaging that night. The next day, I compiled it in Astro Pixel Processor with calibration frames, and was once again amazed that I could capture this from my backyard. My stars were huge, the nebula was faint, and the photo is out-of-focus, but it was spectacular!
Agena Astro informed me they would ship the ASIAir I had on back order after I took this photo. I was expecting this to come like next year since we were still in the post-covid era. To my surprise, it arrived that week. With the ASIAir, I would solve most of my problems as far as finding objects. I could easily plate solve, but again the ASIAir’s software would not support the Fujifilm camera; I could hack it and use my guide camera as the main camera and then switch them, but it just seemed like too much effort. So, my initial instinct was to get an affordable Canon Rebel. I then realized, to get it to its best for astrophotography, I need to modify the filter or jailbreak it so I can get more of the Hydrogen Alpha spectrum out of it. That would cost $200-$300 and the camera would cost about $500-600 used on KEH.com (at least for a decent Rebel). Together, that was $700-$900. I might as well just get a cooled ASI camera for that cost. So, I purchased the ASI533MC for $900 and because it was a dedicated astrophotography camera; it was ready for the Hydrogen Alpha spectrum and needed no mods. It also came with the advantage of being a cooled camera, which reduces the noise in long exposures. The only reason to buy a DSLR is if it was a primary camera used for terrestrial photography OR if you were dead-set on a larger sensor, but I think the astrophotography camera’s cooling is even better than having a larger sensor. Some people don’t realize how important the cooling is and what a difference it makes to the photos and your time. With cooling, you can set the camera to 14°F for all pictures and keep it there. You can then take your darks the next day and adjust it to 14°F to match the temperature your lights were recorded at. With a DSLR, you need to shoot darks at the same time or immediately after so they are around the same temperature. This is time-consuming and most people probably don’t bother, resulting in much noisier pictures, even with a larger sensor.
With the ASIAir and ASI533MC, the plate solving brought on a whole new world. I no longer needed to star hop to a nebula and then move my Skyguider Pro around until the nebula appeared in the photo. In fact, my test photos didn’t need to reveal or show the nebula at all. Through plate solving, the ASIAir could take a 1-2 second exposure and then “solve it” and give me the exact coordinates of where I was in the sky. I’d then reference my target’s coordinates and move my right ascension or declination in the correct direction, and solve it again and again and again until I finally arrived at my target. Admittedly, this took a lot of time, but it was manageable and it worked every time. The crappy part was when you had to do a meridian flip and do it all over again. Most nights, I’d only start after the meridian flip.
The more I talk about using the Skyguider Pro for astrophotography, the more I don’t know how I put up with it for so long. While it was a great starter mount to learn about the sky, it absorbed so much of my time. Back then, my integrations were 5–6 hours. Now they are 10+ hours because I no longer need to fiddle with manual meridian flips or centering an object with my bare hands!
Put Your Money Where Your Mount Is
That’s the consensus in the astrophotography community. After 6 months and 10 targets of manually moving the Skyguider Pro to the correct place in the sky, I realized it was time to upgrade if I were to continue doing this. I knew one thing–I had the energy and motivation to be out every night recording the sky, even if it was this difficult. I knew I liked this hobby, and I was ready to take the next step.
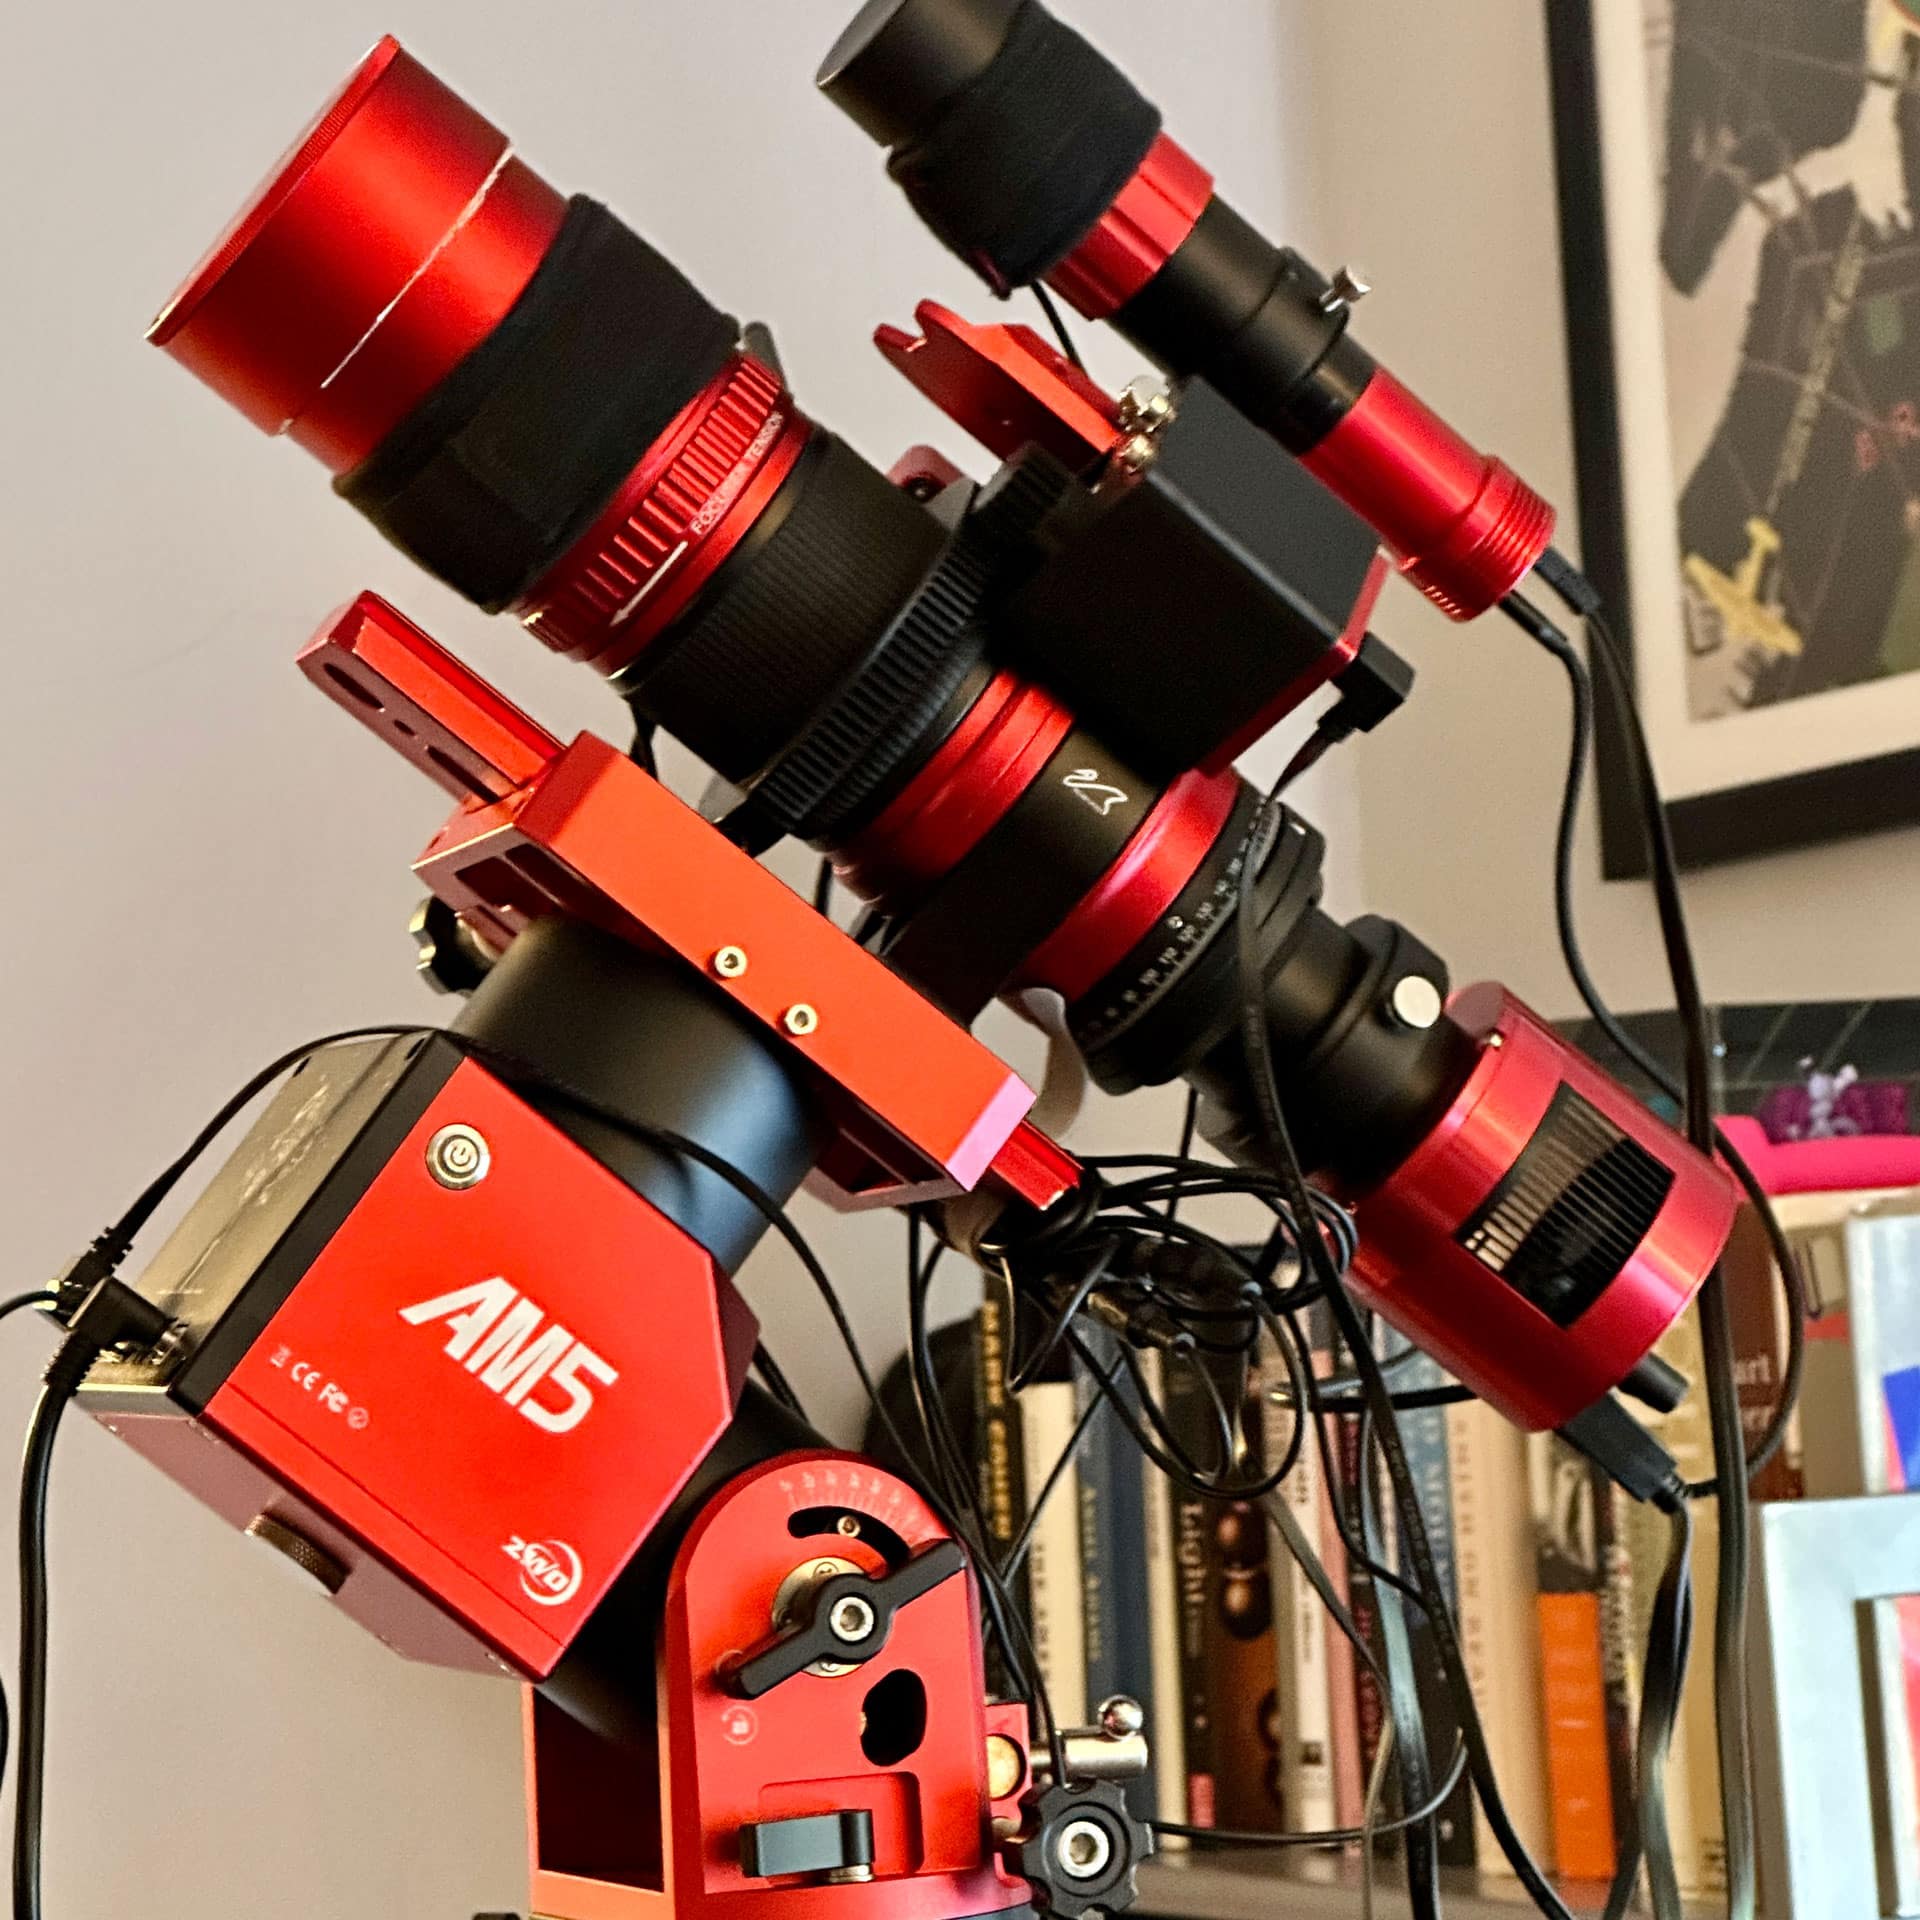
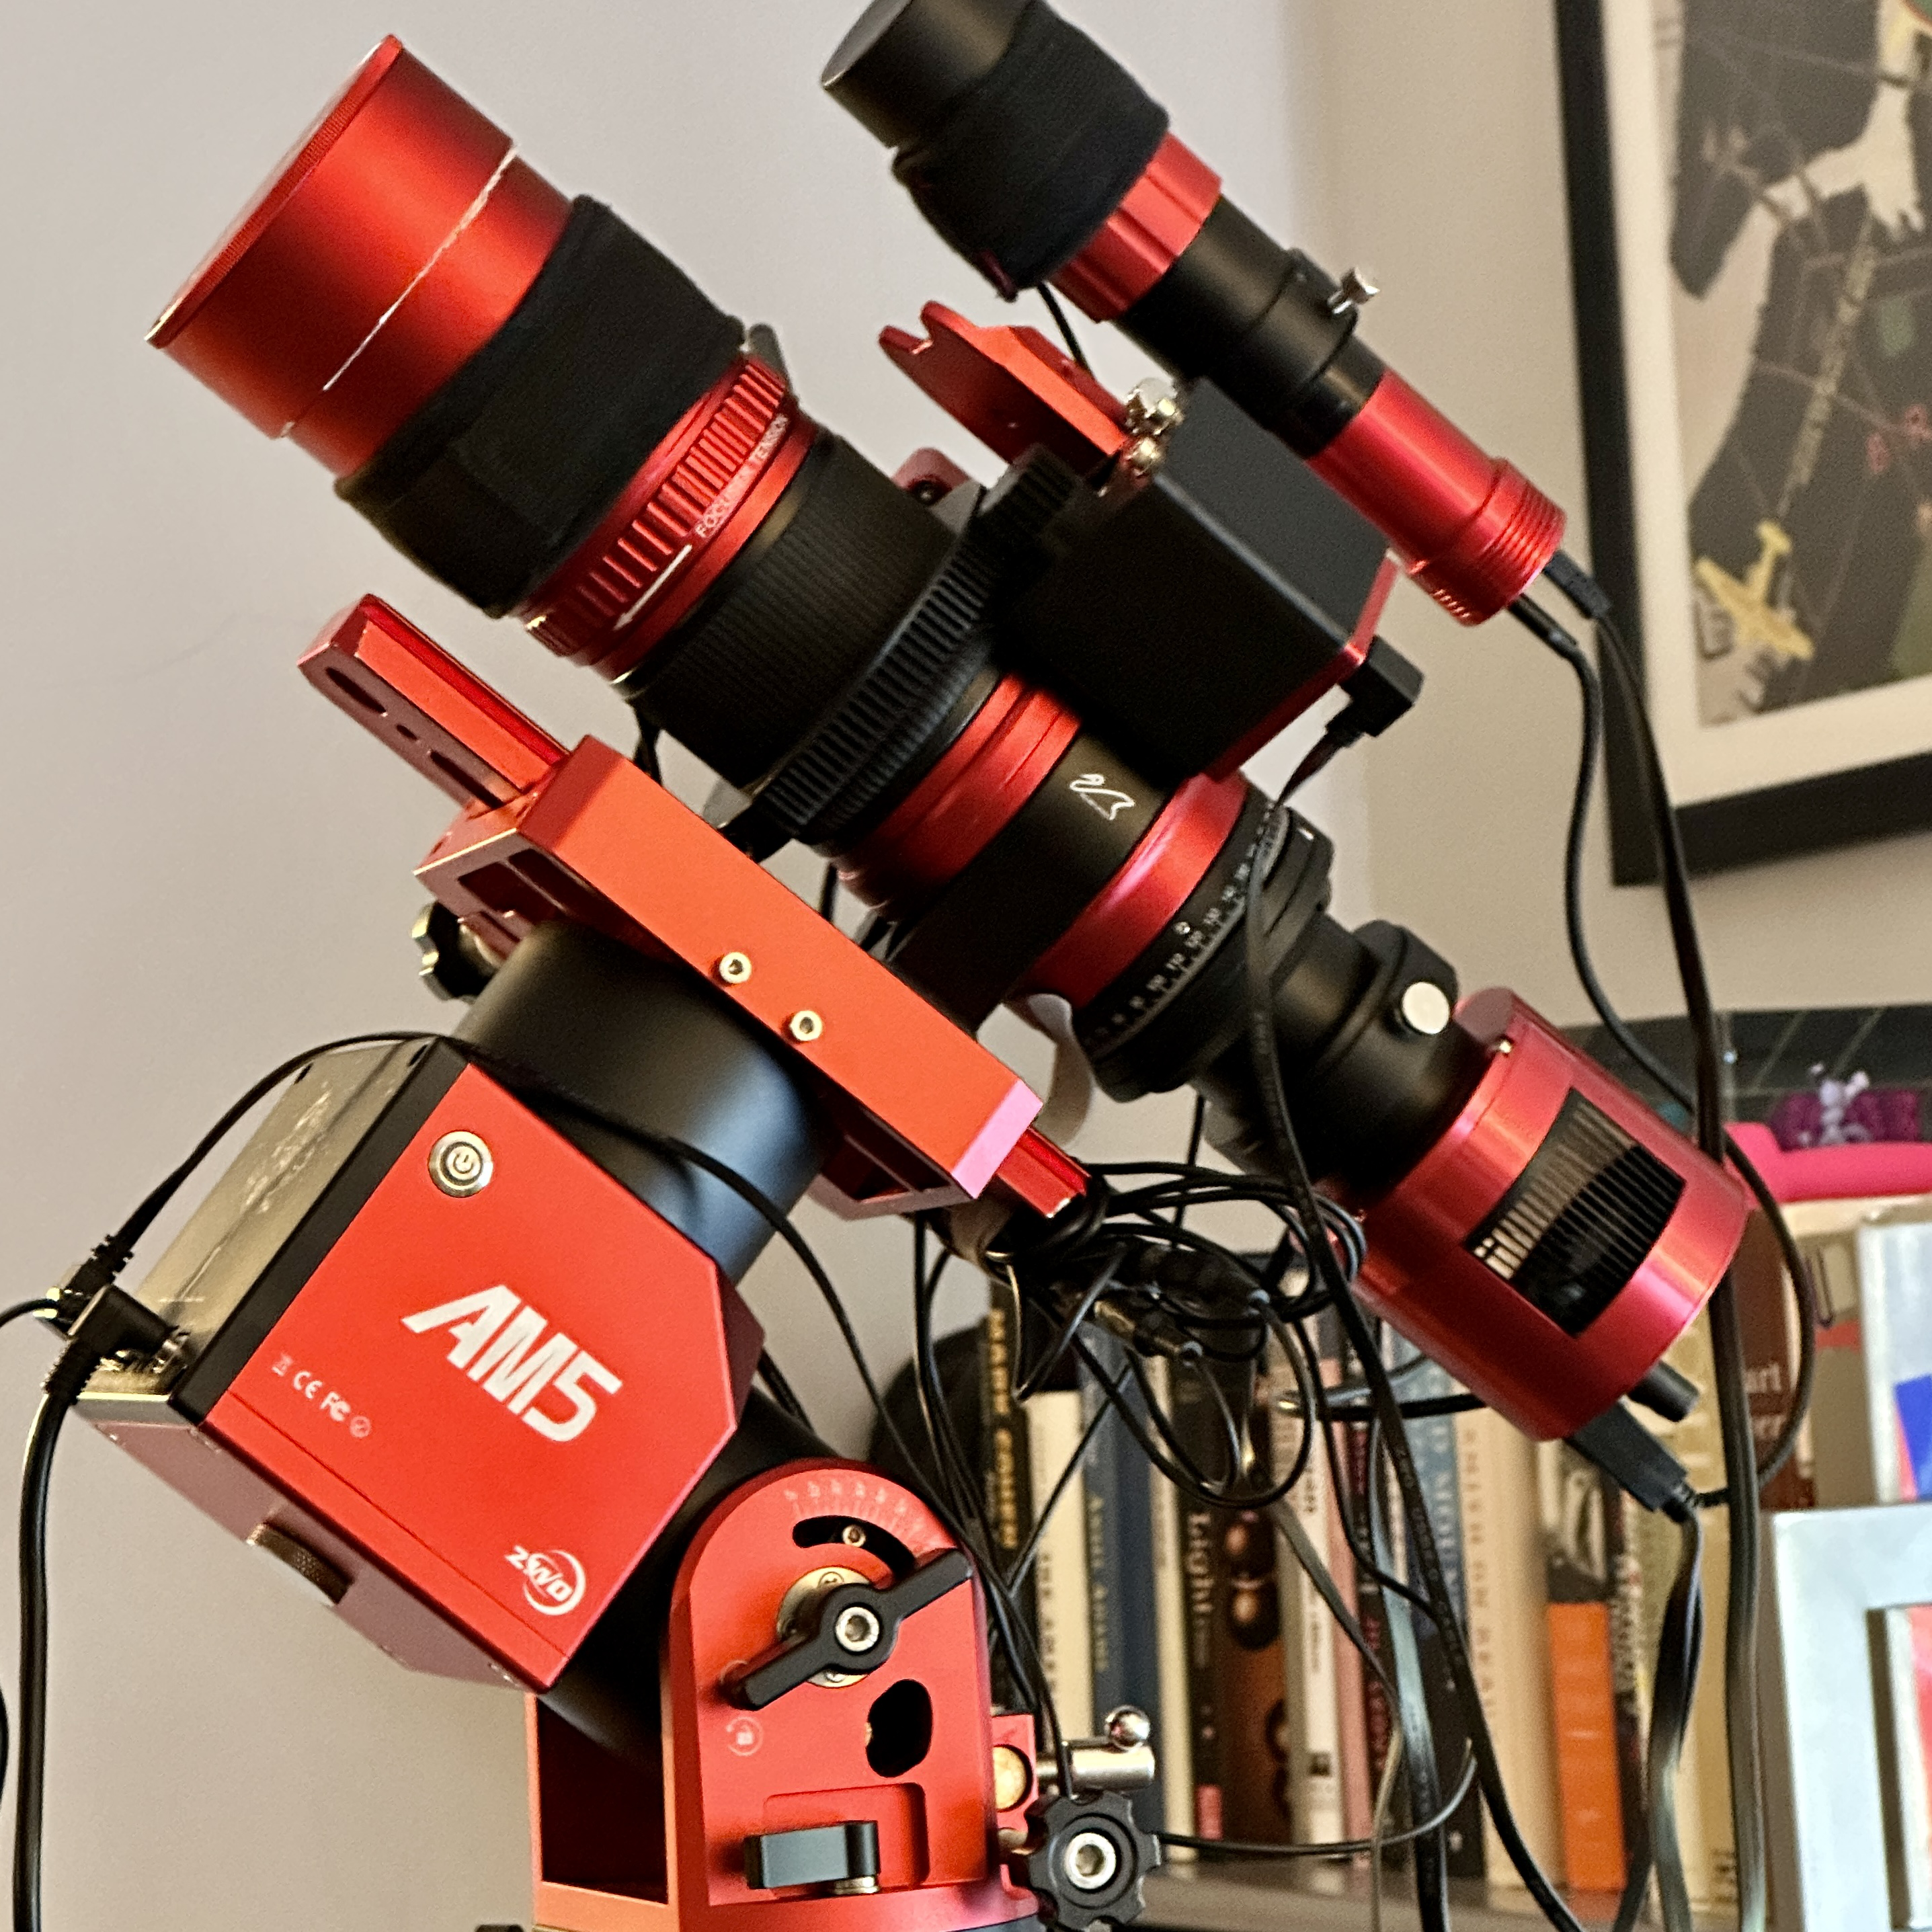
I bought the ZWO AM5 in August or September, and it arrived in November 2022. It was severely back ordered for a long time. Due to it being on back order and its relatively untested nature, I was going to go with an iOptron CEM 40, but I decided against it for a few reasons. First, I wanted the mount to work seamlessly. It’s a struggle to handle all the trees in my backyard and the light pollution in the sky. I would rather not deal with technical difficulties, even if it meant the mount was slightly better. I knew having a ZWO mount would work seamlessly with my ASIAir. Second, I wanted it to be easy to transport–most of my astrophotography is in the backyard, but I’m lazy, and a few extra pounds is the difference between doing versus not doing. When I combined the TC-40 tripod with the AM5, the total weight was around 16 lbs. The iOptron was about 16 lbs for the head alone, not including counterweights. The iOptron LiteRoc tripod was another 17 lbs. Third, the AM5 didn’t require counterweights. This took off an additional 10-20 lbs I wouldn’t have to carry with the iOptron or any other German Equatorial Mount. Fourth, I loved the polar alignment on the AM5–through the ASI camera. The iOptron, in contrast, required doing it through an old school polar scope or their proprietary iPolar, which is like taking it through the camera, but it’s iOptron’s camera built into the mount. You need a separate PC for this, as it surely won’t work with the ASIAir. That may have been the deal breaker for me. Last, the AM5 was new and sleek and even cost less. However, there was a risk. It was new and made by a company who never made a mount before. However, ZWO has a proven track record—almost everything they’ve made turns out to be an excellent product.
I’m pleased to report that after 6 months of use, the AM5 lives up to ZWO’s excellent product reputation. I have had no real trouble with it. It turns on and is ready to go, starting with an all-too-easy polar alignment. My guiding error on the Skyguider Pro was on average about 1.1–1.5 carrying a 7 pound (3.18 kg) Redcat 51 and accessories. My guiding error on the AM5 is about .30–.60. As I’m writing this, it’s carrying an AstroTech AT115EDT with accessories weighing in at 20 pounds (9.07 kg) total and has had a .30 guiding error for most of the night.
The AM5 made life easy. I go outside, polar align quickly, then come inside to carry out the rest on my iPad. Here’s to hoping the AM5 will last for ages and keep up its dependability. I’m still concerned that I bought it in its early stages and it may not turn out to be a time-tested rock like the Skywatcher EQR-6. Only time will tell.
Going Mono
One of the first articles I read about astrophotography suggested you purchase a mono camera if you live in a light-polluted area. I was perplexed and wondered why a mono camera would yield better results. There is 1 answer: filters.
Narrow-band filters make mono special. With a 3nm hydrogen alpha narrow-band filter, you can block all other light except the bands from 654.8–657.8 (3nm span) where the deep red color of Hydrogen Alpha found in almost all nebulas and even in galaxies lives. The entire red spectrum which you get with a red filter is roughly from 600 to 700, which is 100nm wide. That’s letting in a heck more light than your narrow-band 3nm filter and you could imagine that most of that light in that 100nm may be unwanted light pollution. Narrow-band allows you to target specific colors unique to targets in space and exclude everything else, including your neighbor’s motion-sensitive floodlights.
We can use filters such as the Optolong L-Ultimate on color cameras to exclude the bands that light pollution travels through, but it’s not as effective. Color cameras record all 3 colors at once and then create a single color image. So, if you were to use a Hydrogen Alpha (Ha) filter on your color camera, you are effectively using 2 filters. First, a color camera is only picking up 33% of red, since it’s also picking up 33% of blue and green at the same time. So, that means the most Ha you will get is 33% since Ha’s color lives in the red spectrum. With mono, you are getting 100% of Ha when you use that filter. However, filters like the L-Ultimate play to the color camera’s strength and pick up both Ha (red spectrum) and Oiii (blue/green spectrum) at the same time in a single color exposure. You can use AstroPixelProcessor to extract these 2 narrow-band colors out of your color image. You then effectively have a Ha and Oiii image from 1 color image. It works great, and I did it this way as long as I owned a color camera, but it’s still not as effective and clean as mono. For example, Ha and Oiii regularly overlap each other. When we record a single image of both, how can we easily separate them as we would with a mono camera? I know AstroPixelProcessor works wonders, but I have to believe there is some loss of signal. Finally, if a color camera and L-Ultimate are creating 2 images with a single color exposure, those 2 images from 1 are still only using 33% of the sensor each while with mono you shoot 1 filter and use the whole sensor. In the end, mono just makes sense for this hobby and its requirements.
I started with a color camera as I thought it would be easier to learn that way (and it is), but it was always my intention to go mono. After I got the mount, I sold my ASI533MC and got its mono sibling, the ASI533MM. I also returned my Optolong L-Ultimate, which I recently bought from Amazon and sold the Optolong L-Pro and the UV/IR cut filter. With all that sold or returned, I could buy Antlia 1.25 inch (31.75 mm) 3nm narrow-band filters and Antlia LRGB filters along with a ZWO filter wheel.
I only shot about 6 objects out of the 24 I have on Astrobin in mono, but I can hardly remember what shooting with a color camera or processing it afterward was like. I’ve learned so much more since I’ve been shooting mono, and my Pixinsight workflow is entirely different at this point. I’m happy that I made this move and now I can’t wait to upgrade to the ASI2600MM, but that will require a new filter wheel and bigger filters, setting me back another $2k or so even with selling the existing ASI533MM, filter wheel and filters.
P.S. Don’t tell my wife I was thinking about a $2k upgrade, I’m in enough trouble already.
The Final Upgrade (for now)
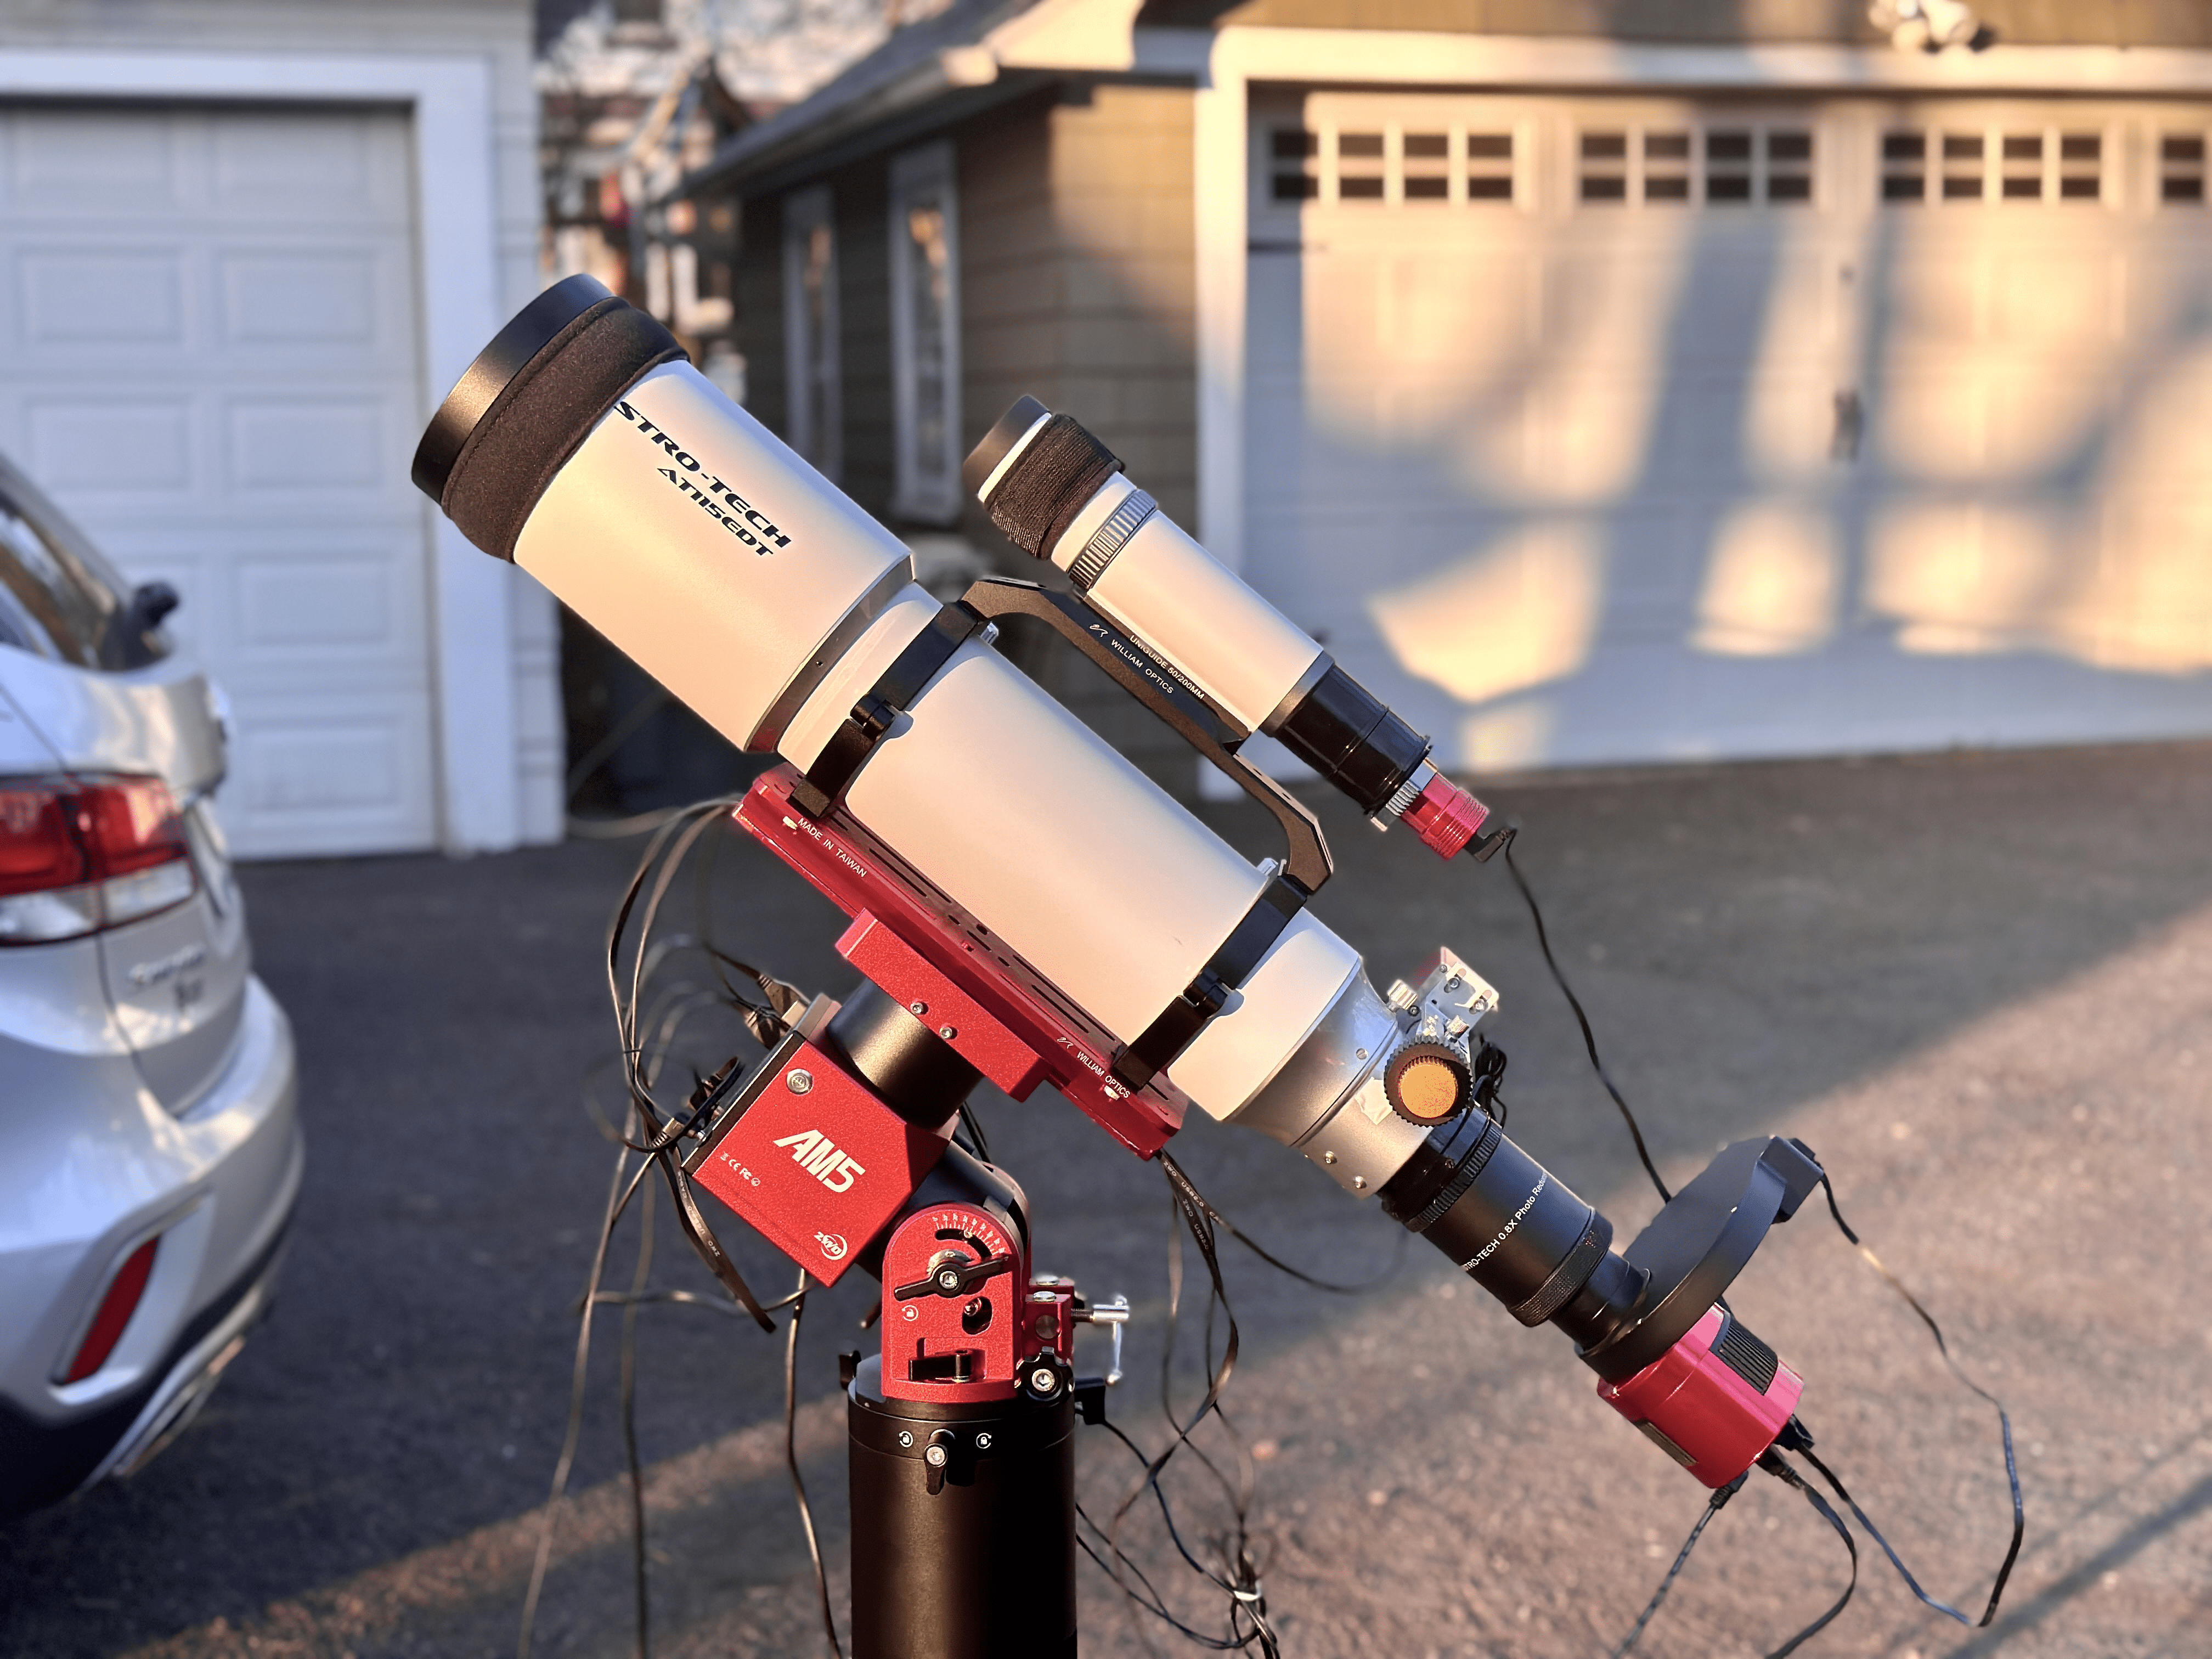
Ok, I got one more thing to complete my first year of astrophotography. I got a longer telescope. After all the money I sank, I was still only working with a Redcat 51, which is a mere 250mm. The Redcat is a perfect pair with the ASI533MM for wide field photography of large nebulas, but it’s not ideal for small—medium objects. So, I got an Astro-Tech AT115EDT, which comes in at 644mm with a .8 reducer and 805mm without a reducer. From now on, this will probably be the telescope I shoot most of my astrophotography on. I’m already using it for galaxy season and love it, although I wish I had an SCT for galaxies—that will be next (shhhh… I did it again!). The AT115EDT will be great for medium-sized nebulas like The Wizard Nebula and Pac-Man Nebula, as well as close-ups on larger nebulas like the North American and Elephant Trunk.
While the AT115EDT is a generic, low-priced scope compared to scopes with similar specs from Stellarvue or even William Optics—it punches way above its weight. It doesn’t have FPL-53 glass, but it has an equivalent to FPL-51 glass. Perhaps the downgrade in glass from premium telescopes makes it more affordable. It has some chromatic aberration, but that’s correctable in post-processing.
I also think it’s a perfect match for the AM5, as it’s about a 20-pound payload with the camera and guide scope on it. The AM5 requires no counterweight at this weight, and it has no problems carrying it. As noted above, guiding error is around .30-.60.
Pixinsight
When I started this hobby, I wanted to avoid buying Pixinsight. It was about $300 and I already had a subscription to Photoshop. I learned astrophotography by watching videos of authors who had similar equipment and post-processing workflows. Peter Zelinka, in particular, used a Skyguider Pro and Photoshop. I ended up buying his video series to learn more and get tips. Ironically, Peter’s astrophotography equipment and software grew in parallel to mine as he purchased a ZWO AM5 and his new updated video series focuses on using Pixinsight. Believe it or not, this was just coincidental. We were on the same path. I stopped watching his videos after I got the AM5. At that point, I kind of “outgrew” his tutorials, as I learned almost everything he offered. However, I thank Peter for his excellent tutorials (and very soothing voice); I’m uncertain I would have learned so much about astrophotography and have stuck with it if it wasn’t for him.
Maybe it’s the timing in the industry, but Pixinsight is the undeniable champion of astrophotography post-processing. Photoshop is great for final touches, but you cannot do over half the things you can do in Pixinsight with Photoshop. Some of it may be possible with Photoshop, just as stretching your images is possible in PS, but it’s far from ideal. The Pixinsight game changer for me was the preview of a linear image using the screen transfer function. That allowed me to keep my image linear and make adjustments to it, which reduced noise. You wouldn’t get something like that in Photoshop, as no other type of photography has such needs. Also of note are the RC Astro tools like Noise Xterminator, Star Xterminator, and now Blur Xterminator. They are absolutely remarkable in PI and while they are available for Photoshop (except Blur Xterminator); they are not as good as they are in Pixinsight.
Pixinsight undoubtedly has a huge learning curve. I remember looking at the processes menu for the first time and being overwhelmed with the number of processes there were as well as what they were called: deconvolution, screen transfer function, morphological transformation and many more nerdy sounding not-obvious-what-it-does processes. However, once you watch a few tutorials or read a book, the power of Pixinsight becomes obvious and you ask yourself, why didn’t I do this earlier? I’d suggest looking at these resources, which are available for free:
- Entering Into Space / Pixinsight One-Shot-Color (OSC) Processing: This is great for those using color cameras like DSLRs or OSCs.
- Lefty’s Astrophotography / Pixinsight SHO/Hubble Palette: A walkthrough of the steps taken for mono astrophotographers to achieve a SHO (Sii, Ha, Oiii) image combination.
- The Coldest Nights / Dynamic Narrowband Combinations with Pixelmath: It’s not a video, and it’s a bit more advanced, but you can take your photos to the next level using Pixelmath to merge your SHO images instead of the standard channel combination.
Thoughts on Beginning Astrophotography
I have some thoughts after experimenting for the past year. I think if you are starting out, have the money, and you know you love this, go for a good mount. If you don’t have money or are not sure about your longevity in this field, then go for a star tracker with a wide field telescope.
Having capable equipment (such as a good mount) makes the process easier and less timely, but it doesn’t result in better photos if you are using a wide-field telescope or camera lens, which is where most beginners should start. It’s when you get to longer focal lengths that a good mount becomes essential. I know that’s blasphemy in the astrophotography community as we always regard the mount as the single most important piece of equipment and it is, but it’s not as mission-critical when using a wide-field refractor.
A mono camera and narrow-band photography opens a new world of creativity and flexibility that’s not as easily achievable with a color camera. However, nobody ever suggests starting with mono. It’s complex, and color cameras are much easier to deal with when you are learning the ropes. You can simply start with a star tracker like the Skyguider Pro as a mount and a DSLR (I recommend Canon or Nikon because of compatibility issues with software) as well as a wide-field telescope like the Redcat 51.
You don’t need an ASIAir, as you can use any of the open-source software available if you have a laptop. However, for $300, the ASIAir makes life a hell of a lot easier since it’s a one-stop-shop solution combining all the software you need on 1 platform. Last, a guide scope is essential. I know some people think guiding is optional, but it’s not. My ZWO AM5 can’t take a 30-second exposure without slight star trailing. If you want to take long exposures (and you will), you need a guide scope and camera. I’d suggest the ZWO ASI120MM camera & ZWO Mini guide scope. Together, they cost $250.
Go buy Pixinsight now and you won’t regret it. As I noted, it has a learning curve, but once you get it–you will be stunned by what you can do with it compared to mainstream photo software like Photoshop.
It’s Only Been a Year?
It’s hard to believe it’s only been 1 year. I started off with a cheap telescope for visual observing from Best Buy and ended up with a great mount, 2 telescopes, and a mono astrophotography setup. I’ve also made 24 images.
I can’t wait until this summer. The summer and fall targets are the most exciting and none of my new equipment has been used to photograph them, which makes it even more exciting.
Clear Skies!