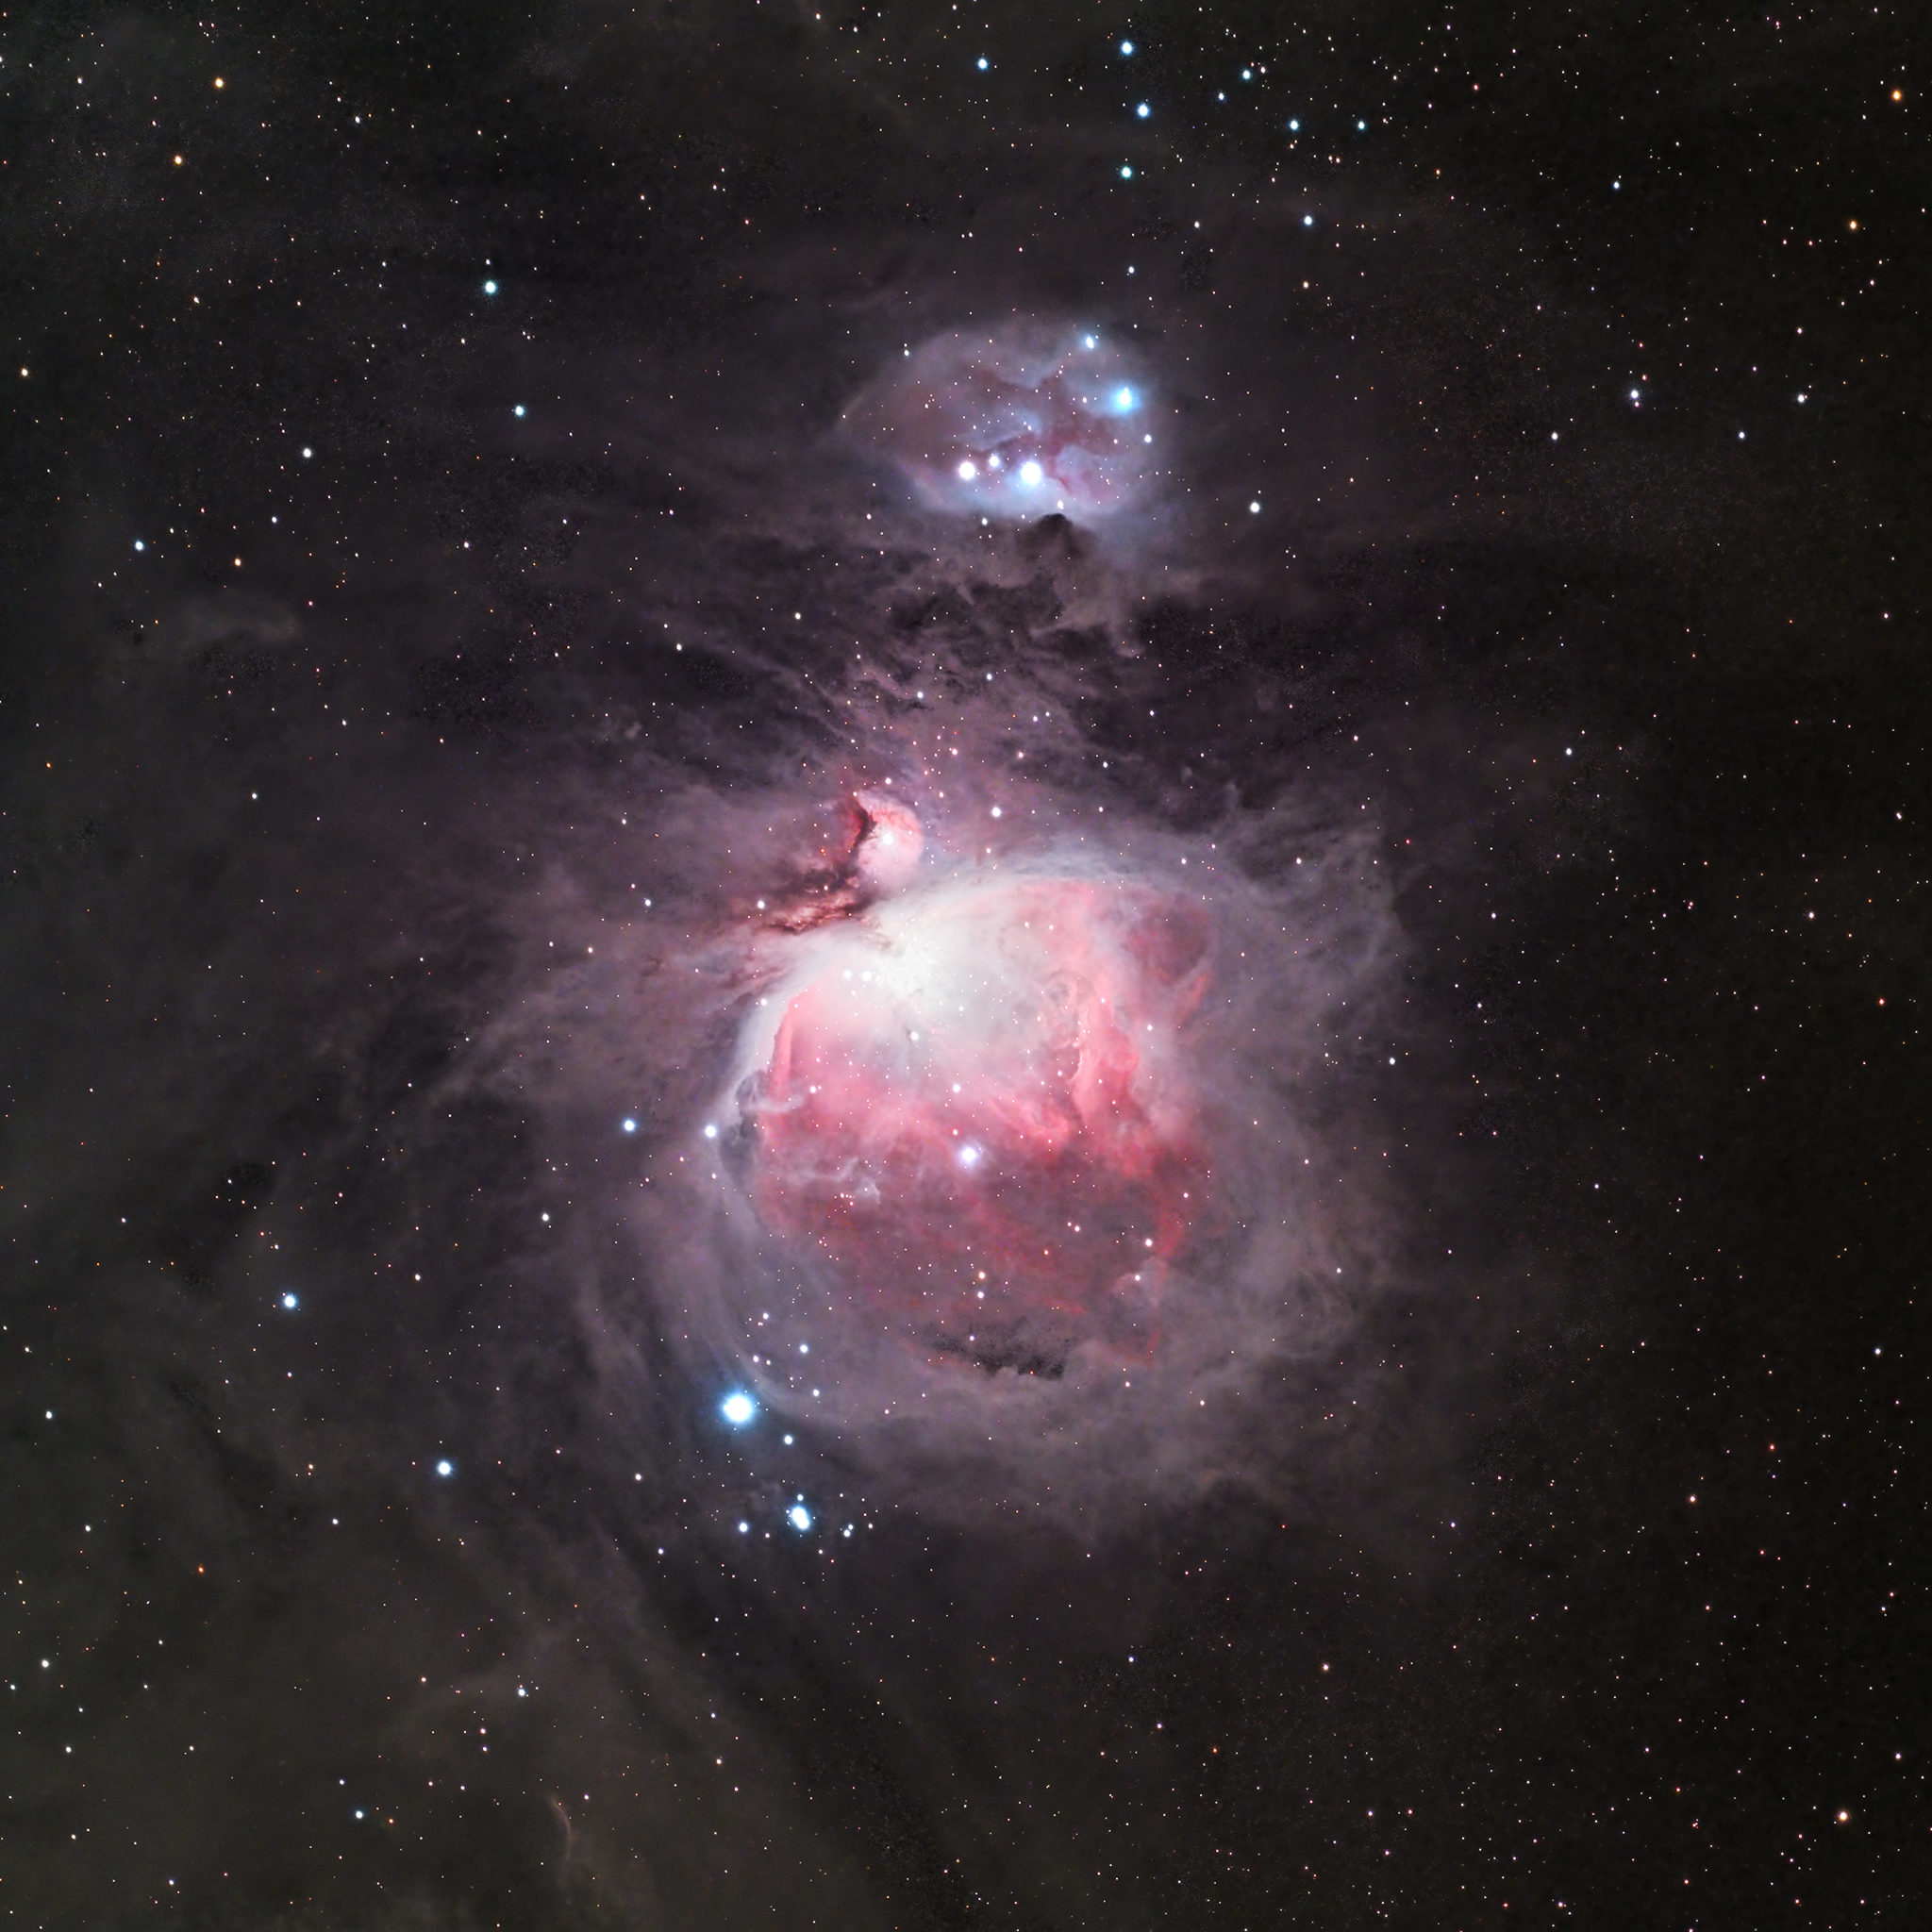
I’ve been doing astrophotography for 2 years now and although I’ve tried shooting the Orion Nebula before, I never fully produced an image until now. It’s one of the most popular targets, a favorite of beginners, and ironically complicated to shoot and process! I shot 5 channels for M42, including Lum, Red, Green, Blue, and Ha in different exposure lengths to compile an HDR image. Once I had 7 hours of data, I sat down and realized I did not know how to process this. So, with some experimentation and help from the internet, I figured it out.
Shooting M42
I went into this knowing I wanted an HDR composition because the Orion Nebula has some extremely bright areas and faint areas. The core of the Orion is super bright and even a .5 second exposure can capture it. The remaining parts of M42 are not as bright, but they are not as faint as the outer rings of a galaxy either.
Some people take many exposures of the Orion. In my case, I only took 2 different exposures: a short one (15 seconds) and a longer one (2 mins). If I was shooting with an OSC camera, I may have done multiple exposures, but doing that across 4 mono channels can get cumbersome, especially when you need to load them all into Astro Pixel Processor.
In the end, I had 7 hours of data, including roughly 3 hours of Ha. So, Ha was almost half of the data I captured and I wish I captured more of it because it helps to illustrate the outer dust surrounding M42. See Ha channel below vs LRGB and how HA really brings out the surrounding area. Rollover to see the difference.
LRGB
Ha
Processing the Orion Nebula
This is where things got interesting. As noted above, I had 2 sets of LRGB and 1 set of Ha. That was 9 master files I got out of AstroPixelProcessor (APP). There were 2 unique parts to processing this: HDR Composition and figuring out what to do with the Ha data to maximize the use of its signal.
HDR Composition
Once I had all my master files, I opened them in Pixinsight and used HDR Composition to combine the LRGB multiple exposures. Once combined, this left me with 1 set of LRGB and a Ha channel, as I would normally have. You may think that the HDR Composition part was the hard part, but it may have been one of the easiest things I ever did in Pixinsight. While the core in my photo is a little overexposed, it’s not extreme. I can still even see stars inside it. I may go back and try to refine it later using HDR Multiscale Transform.
Maximizing the Ha Signal
The harder part of this was figuring out what to do with my Ha channel. Clearly, as you see above, the Ha channel had a lot of signal and more so than the 4 hours of LRGB data. I first tried applying the Ha to the red channel as I did with the Horsehead Nebula, but that resulted in an overly red Orion Nebula, which was not desirable. I then thought, why not apply the Ha channel as luminance? It’s full of signal and will add considerable detail to the surrounding area. The only problem with this was that the Ha exposure blew out M42 itself, and I didn’t want to apply that to my perfectly exposed M42. So, I cloned the Ha exposure, increased its contrast, and used the clone as a mask to protect the nebula. I then applied the Ha as luminance and got the dusty surrounding area I was looking for. Perfecto!
Processing Video Tutorial
Conclusion
I’m happy with the way this turned out. It was my first time experimenting with what is a unique process. The Orion Nebula is unlike many other astrophotography targets. It’s not your typical nebula that you shoot in narrowband which I have a process for, and it wasn’t similar to the way you process its neighbor, the Horsehead Nebula. It was both unique and challenging. I’m sure I’ll refine this even further in the future, but for now–it’s excellent.