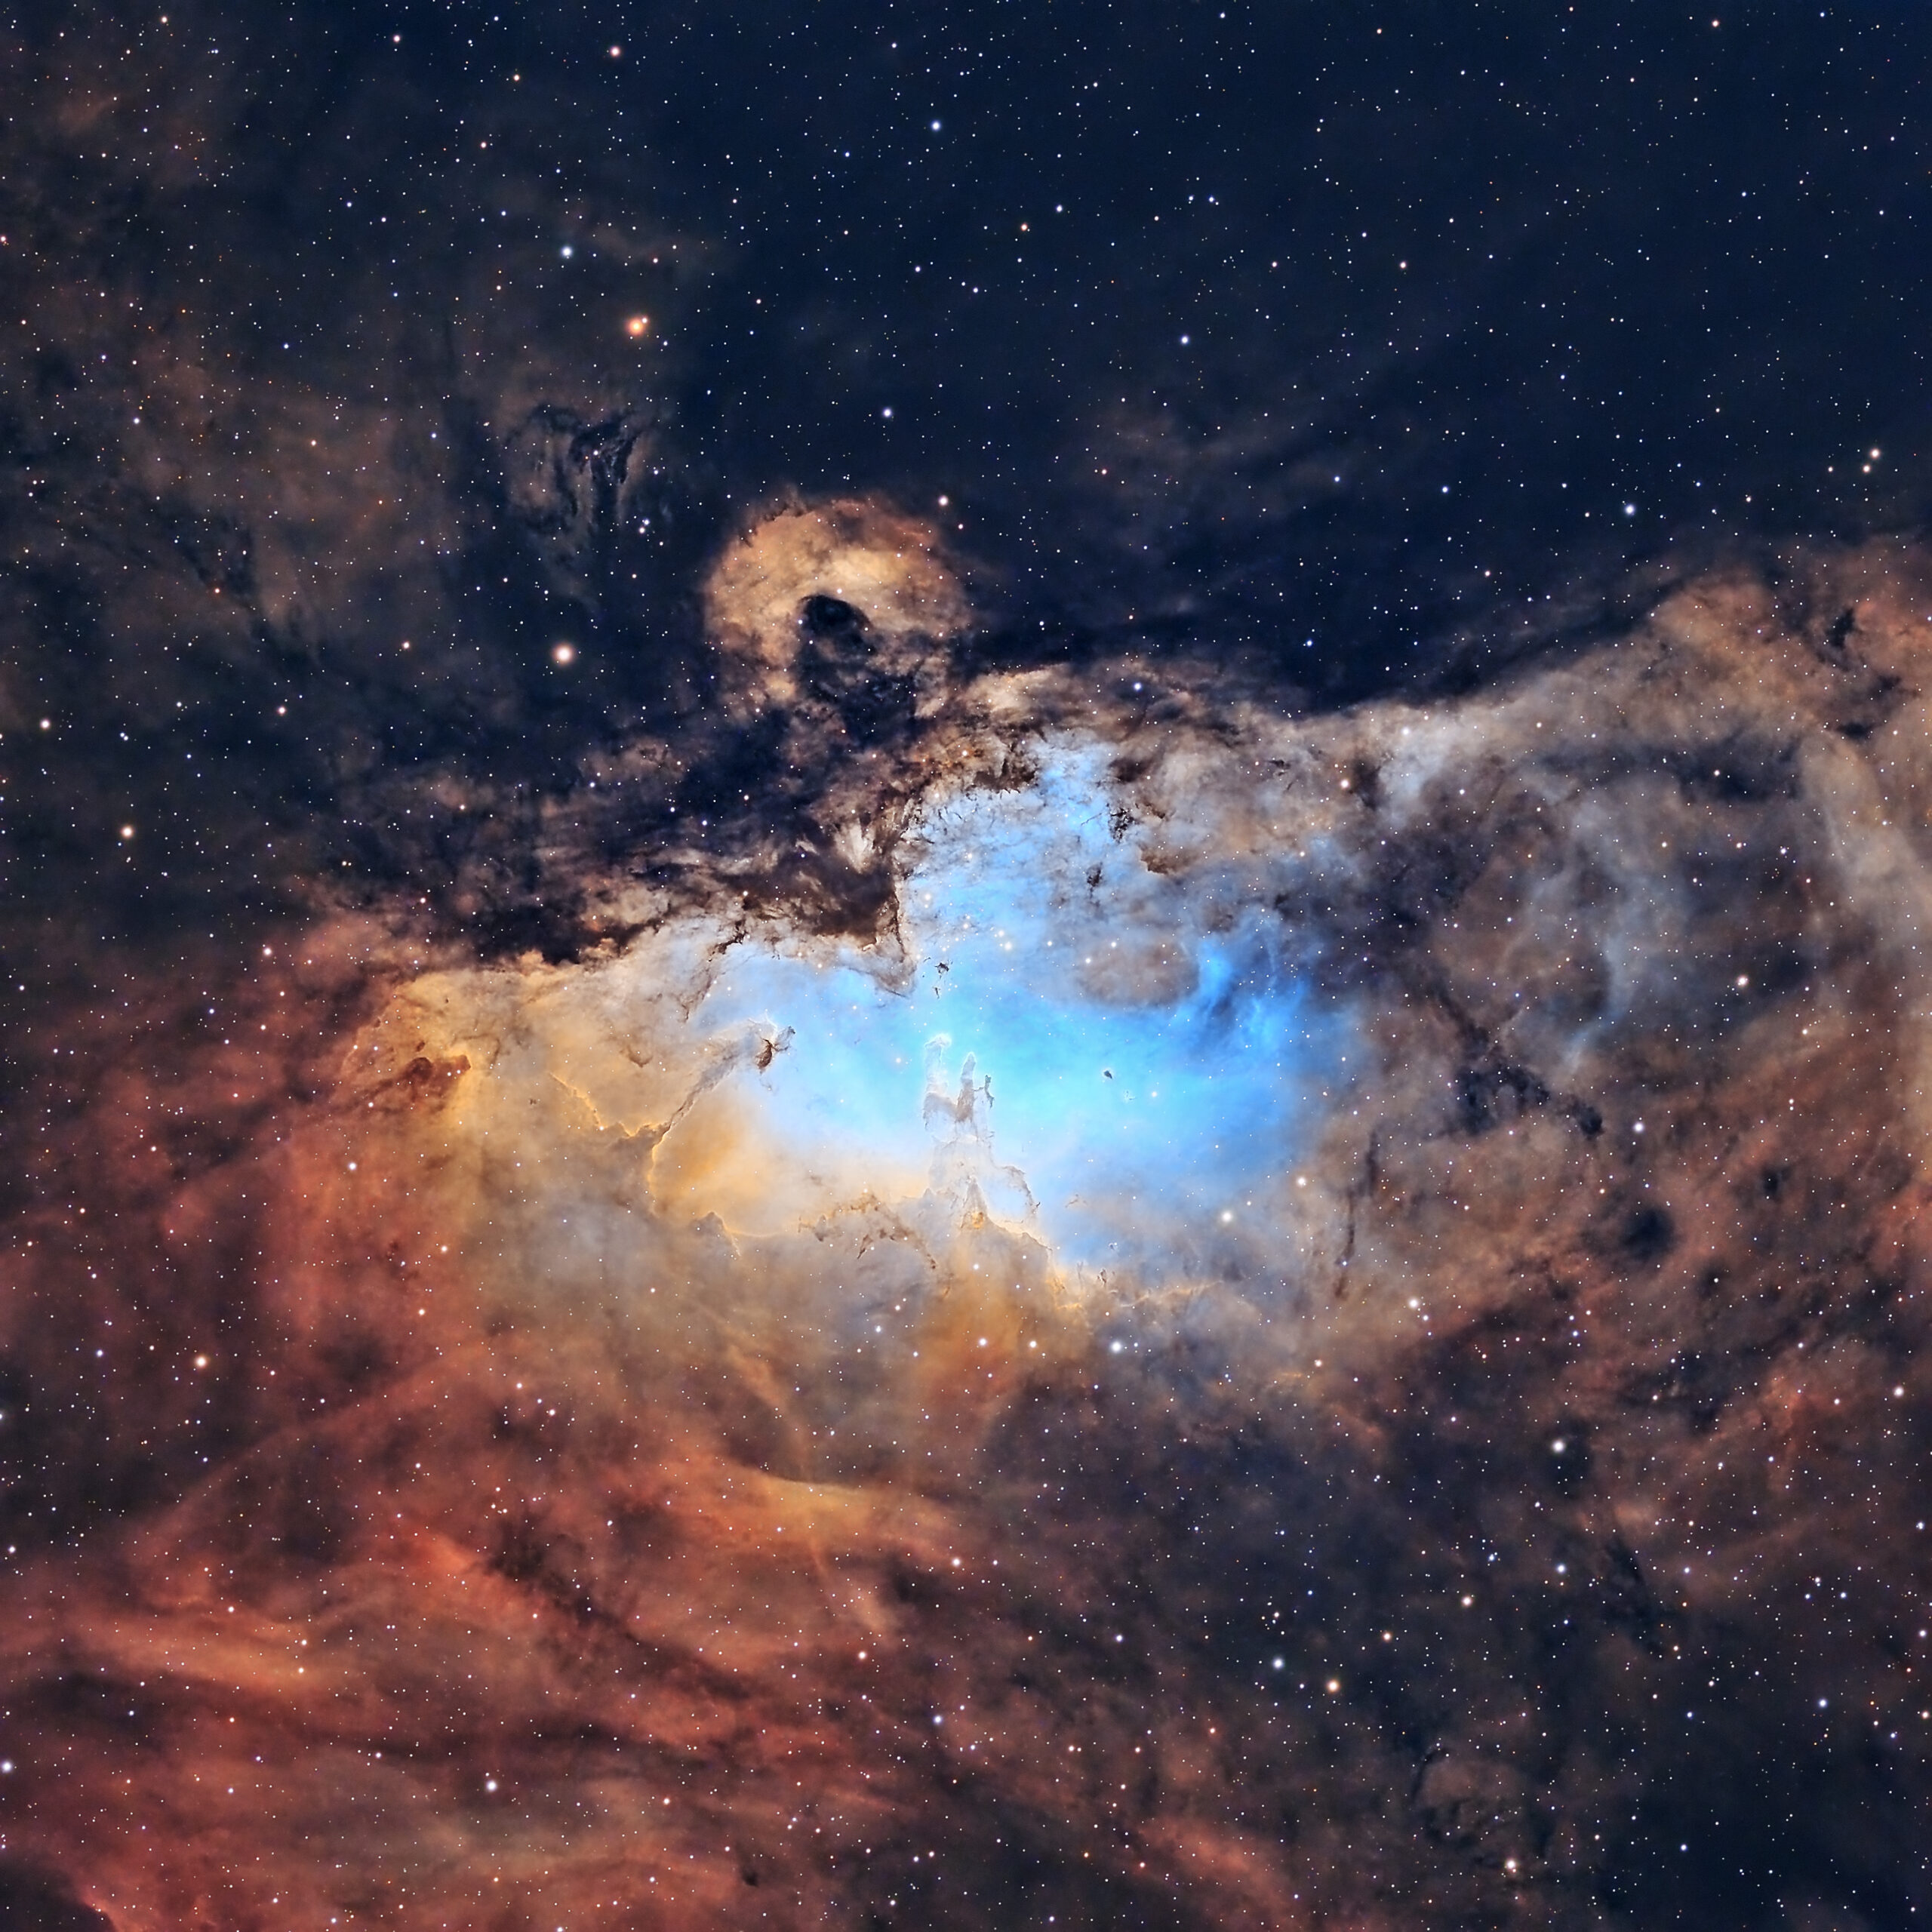
The Eagle Nebula is the first nebula of the season after a lengthy period of galaxies and globular star clusters. I was very excited to say the least to photograph a nebula again. As mentioned in previous posts, I live in a light-polluted area and shooting narrowband is a saving grace as it blocks all extraneous light.
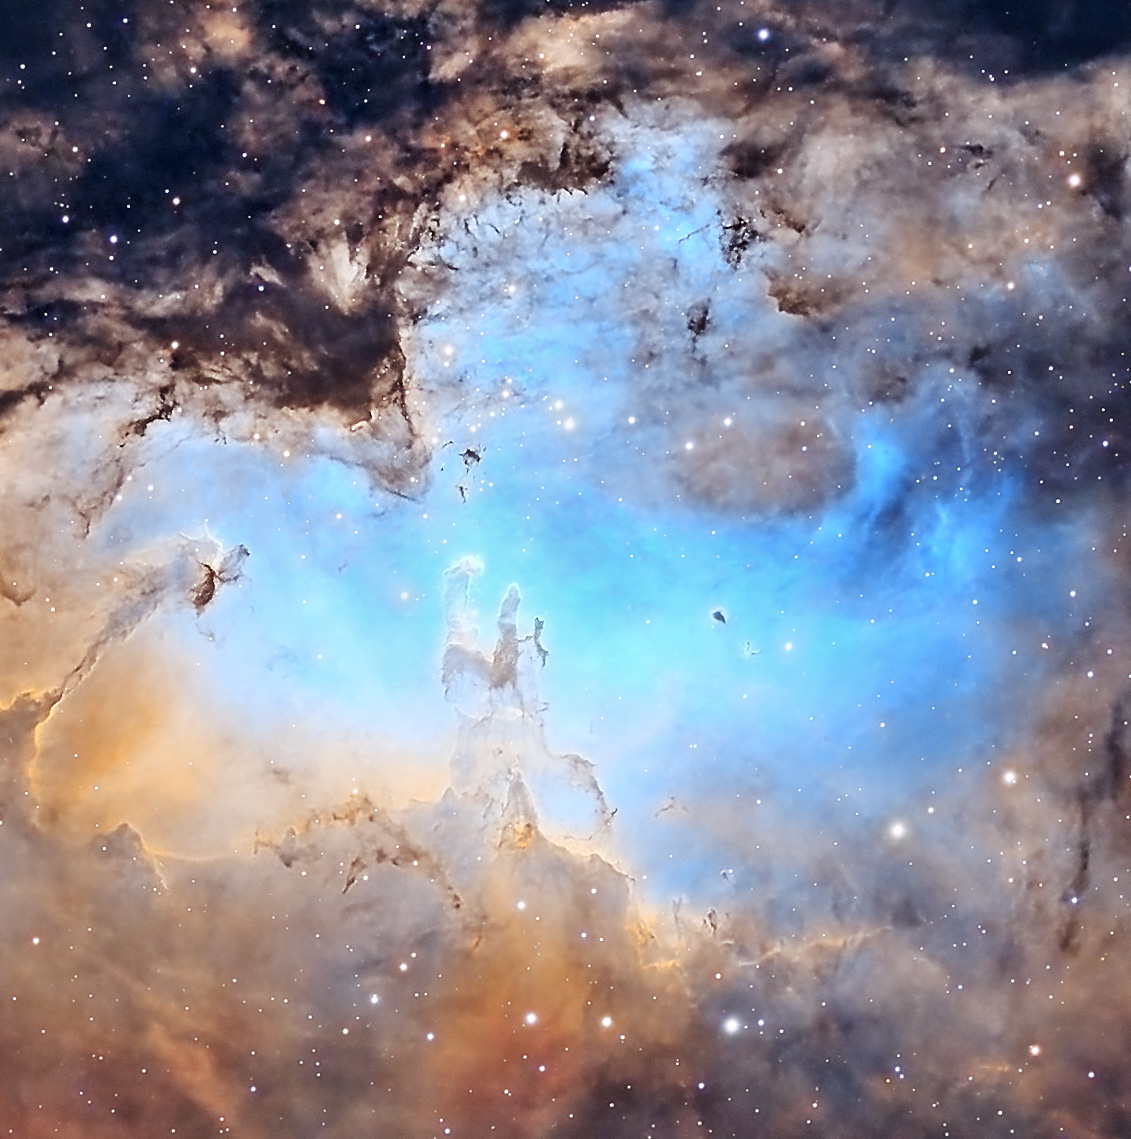
The Eagle Nebula or M16 is perhaps the most well-known deep space object due to it’s core which is often referred to as the “pillars of creation”. Below is a zoomed in version of the pillars of creation (from my photo) that people often see in museums or from Hubble or Webb photographs.
Last year, this picture would have not been possible for me as the south side of my yard was blocked by a huge tree. We recently had that tree taken down and the whole south is now readily available. This just barely made it, it was slightly above my neighbor’s house and tree. I certainly wouldn’t be able to get the Lagoon (M8) from here due to how low that is in the south.
Last year, this picture would have not been possible for me as the south side of my yard was blocked by a huge tree. We recently had that tree taken down and the whole south is now readily available. This just barely made it, it was slightly above my neighbor’s house and tree. I certainly wouldn’t be able to get the Lagoon (M8) from here due to how low that is in the south.
I’m happy with the way this came out. I first did this using a masked stretch instead of a histogram transformation and what a difference the histogram transformation made comparatively. I now understand why Pixinsight offers so many ways to stretch your image. Not all objects are the same and they all require different approaches–especially for something as important as stretching the image.
Here are the steps I took in Pixinsight with this. It was shot in monochrome on my ASI533MM.
Linear
- Dynamic crop all images (Ha, Sii, Oiii, R, G, B)
- Dynamic Background Extraction on all images
- Blur Xterminator on all images
- Noise Xterminator on all images
- Combine R, G, and B images to make a color image
- Spectrophotometric color calibration on RGB image
- Histogram Transformation for Ha, Oiii, Sii, and RGB image
Non-Linear
- Pixelmath to combine Narrowband images using the Forax approach
- LRGB Combine (add Ha image as Luminance)
- Star Xterminator
- Curves Transformation (contrast)
- Curves Transformation (slight saturation)
- Local Histogram Equalization (for sharpening)
- Extract Luminance (CLE) layer from Star Xterminator “stars image”
- Add the extracted luminance image to the RGB image using LRGB combine
- Combine the starless narrowband and RGB image to have RGB stars
Data
| Filter | Time |
|---|---|
| Ha | 4h 24m |
| Oiii | 4h 06m |
| Sii | 3h 06m |
| RGB | 52m |
| TOTAL | 12h 28m |